Here’s a quick post just to show you what I’m up to. I am ear-deep in costume gigs, but this week was particularly dedicated to getting started on one of a pair of wedding dresses I was commissioned to make for this summer.
It’s not what you’d expect when you hear “wedding dress.” No poufy meringue or pick-ups here, no ma’me, but navy shantung silk and pearl organza in the role of illusion neckline? Yes indeed! The bride was taken with a dress she’d seen in a picture but couldn’t quite find the right thing on the rack or in a pattern. So I married (!) a couple of different patterns to get the desired shape and illusion top, and reworked the neckline to my liking. It’s coming along.
The dress features my first pockets, ever, and they went without a hitch! Tomorrow I tackle another first: making my own bias tape. I’ve been practicing on cotton with the little silver tool in the first picture. I particularly liked this tutorial that I found on the dana-made-it blog. Wish me luck!
The bride’s bride will wear a dress from a vintage pattern, I’m just waiting on a fabric delivery to get started — sometimes I shake my fist at Customs! Her pattern is straight out of the 50s, musty, yellowed paper, total Mad-Men-chic *sigh* in an ochre drapery fabric with grey and white birds and branches on it. Hard to imagine? Just you wait, it is going to be magnificent.
What an delight to dress both brides in a wedding, it’s very special. In honour of the opportunity and the occasion, I include this song and video that I just heard/saw for the first time this week. Bless Macklemore, Ryan Lewis and Mary Lambert for their gorgeous, straight-to-the-heart-of-the-matter tune.
Hello my lovelies! It’s been a while, I think I’ve mostly been in Superhero Birthday Party recovery mode! Actually, I’m buried in costume jobs and my own sewing, a dance show next week that I’m costuming and choreographing for, plus the usual mothering … sigh. But I’m grabbing a moment because I want to share how this party went, it was such a blast! I wrote about the invitations a while ago, now here’s the main event.
I made Superhero Capes for each kid with his or her initial, using a free comic book font I found. I printed the initials out, one per page, and used them as patterns for felt letters. I then hand-stitched them to a nicely contrasting circle of felt and machine stitched the whole thing onto the capes I made. Ta da!
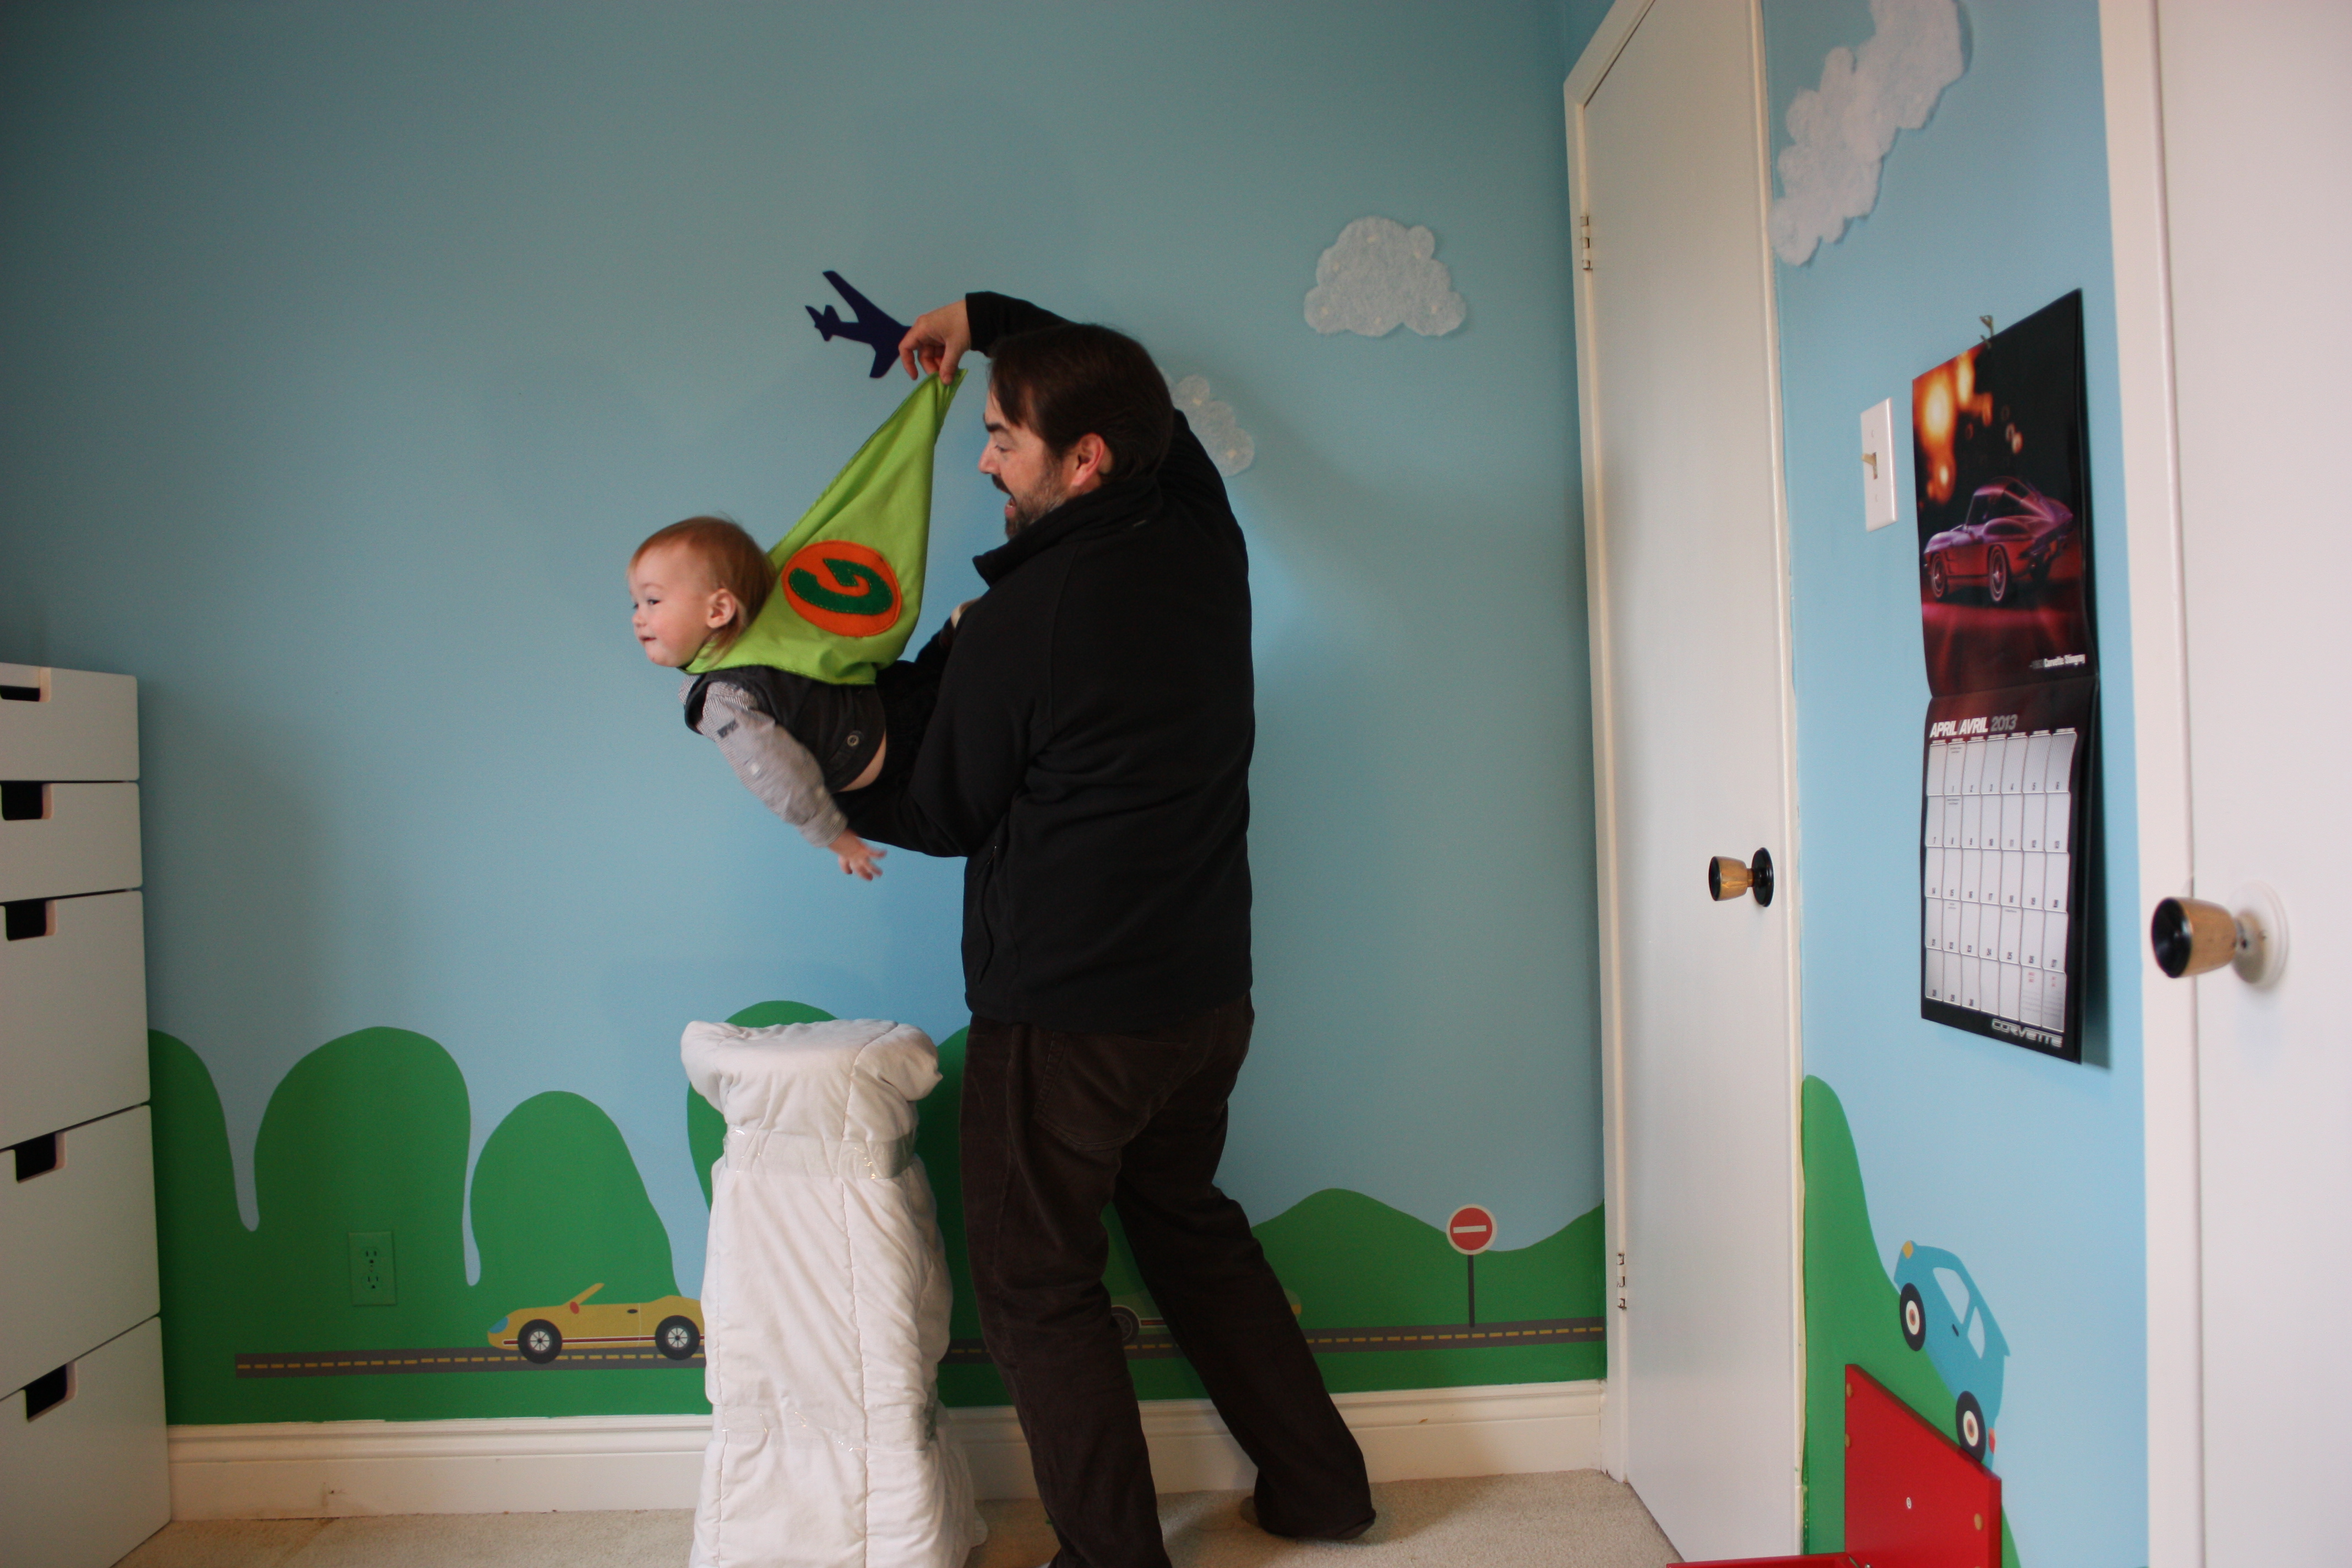
Do I have any really nice, clear photos of the kids in their capes? Of course not! They move way too quickly, and usually don’t have time for posing when good times are afoot. Off the top of the party we played Musical Chairs (Rudi’s favourite game he informed us the day before, I don’t even know where he learned it!), and when you were out you got your cape. I have never seen so many 5-year-olds flopping and pretending they couldn’t find a chair — everyone was in a panic to get out and get a cape! Here are Rudi’s and Gene’s capes laid out on the floor so you can get an idea of the shape. The big one is for the 5-year-old birthday boy, the little one is for the 1-year-old side kick.
I winged the pattern after reading a few other blogs about making capes. I folded one metre of fabric in half for each cape piece (therefore two metres of fabric per cape), drew the longest diagonal that would fit on my fabric and a freehanded the neck line, made a paper pattern from that first one and off I went. I used snaps for attachement as I’d run out of time to sew velcro on — and I really like the result! And yes, I finished the 14th cape half an hour before the party. And yes, I made a friend iron a bunch of them. And pick the stitches out of the two I sewed inside-out at 12:30am. Because I am obviously not a procrastinator at all and am excellent at sticking to production schedules. Ahem. (Thank you over and over Kate!)
Each cape was a different colour with white lining, because Mr. Birthday himself was determined that we should also paint the capes! We ended up using fabric spray paint out on our chilly, barely-spring deck (it was early April and had snowed just two days before!). I cut out a few paper shapes — lightening and such — that way the kids could spray over those and leave a white shape in the negative space. Some, like Rudi, just wanted a glorious mess of colour as you can see here! Either way, it worked well, cheers Tulip fabric spray paint! Capes dried on the line within the hour and went home with each super kid by party’s end.
Loot bags, in my humble opinion, are important. So even though each little super kid got to keep his or her cape, they also got modest super bags and matching bean bags. So cute. And easy as pie. Actually I find pie really challenging to make. These were easier.
I simply folded a sheet of felt in half, machine stitched the bottom and side, and in the same seam stitched in the giant rik rak loop. I cut out a bolt of lightening for each and hot glued it on. Finishing touch: pinking shears to finish the sides.
Superhero lightening bolt bean bags!
For the contents: super-popping pop rocks in Green Lantern green, classic superhero stickers, a superhero candy stick (which I glued googly eyes to and attached a paper thank you cape to, ridiculous, I know), dollar store finger lights for super E.T. fingers, super bean bags for power tossing (which we used during the party) and a Kinder egg because even superheroes aren’t immune to their charm right?! For the bean bags: same idea as the loot bag. I sewed three sides, left a wee opening, funnelled some beans in, stitched it closed, all on the machine. Finished with pinking shears and a smaller version of the loot bag lightening bolt.
Lastly, the coup de gras, the very best part: super flying photos! In my birthday party planning post, I showed my sad but hilarious test run of the photoshopped “flying” photo idea. Turns out, a dear friend was here with his daughter for the party and has far madder skills on the photoshop than I. So I turned it over to him (thank you Tal!) and we set up a photo studio in Rudi’s room. He took one photo of the background initially and cut and pasted each superhero over that one. He also isolated the two clouds and the plane so he could place them appropriately for each hero. We took the photos from a tripod so that the distance was consistant and covered the stool with a big white comforter so it would be easy to cut out of the picture and more comfortable to “fly” on. I tied long threads to little safety pins and that’s how the capes look like they’re flying — you can see it being held by an adult in one of the before pics. So. Awesome.
BEFORE: Super Rudi, behind the magic curtain, pre-photoshop.AFTER: Super Rudi the birthday-boy on his way to save the day!BEFORE: The littlest super! Wee Gene was not into lying on the stool, so Daddy held him up and the cape out.AFTER: the fantastic result. Super-Gene flies into the picture from stage left!
This time of year is the major party period in our little family: cousin’s birthday, easter, Rudi’s birthday, hubby’s birthday. It’s about to roll out whether I’m ready or not! So I’m prepping, mind whirring, already behind on the crafting schedule!
The biggest excitement brewing is for Mr. Rudi’s 5th birthday. He wants superheros, which I obviously know all about (I do not). I wanted to go non-specific hero, he knows Spiderman and kind of has an idea of Batman and a few others, but I think we’ll keep it general and imaginative. Thus I am working on capes for everyone with their initial on them and we’ll have cape decorating, jumping pardon me, flying contests, speed trials, etc, basically run them ragged!
We’re even planning to set up a flying photo booth where the kids “fly” on a stool. I’ll then photoshop the stool out so it looks like they’re flying against Rudi’s newly painted bedroom walls, featuring hills and sky! My photoshop skills are pretty minimal, perhaps even ghetto, but I can (kind of) rock the clone tool! Here’s my rough/feeble test run. But it’s for 5-year-olds, they’ll totally love it, right?!
Of course though, the first step is invitations and I cannot not make a craft project of those. I am incapable. It gives me too much pleasure. Here’s what I came up with:
I downloaded a couple of free comic book fonts which gave the text a superhero feel!To make it feel even more comic-bookish, I drew a simple map for the location, took a photo of it in Instagram and popped the image into the design.I got to this point and felt the capes were too plain. To add a little quick detail I printed red Rs on circular labels (see next photo). Et voila, instant birthday-boy cape!The capes are felt. I drew a little pattern on paper that was the right size. Then they’re just stitched over top of the “party details” text.I made the invites longitude-wise and when it came to enveloping time I was momentarily stumped. But then I realized I could just cut 12″ x 9″ envelopes from top to bottom, tape them with decorative washi tape and boom, custom envelopes!All washi-taped and ready for mailing or hand delivery. Invitations sorted.
A month ago I got moving again. It was about 16 months post-baby and I was suddenly so ready to move, stretch, find my body again beyond the cozy curl of nursing and snuggling and nurturing my wee boy. Funnily enough, it was the same trajectory with my first son, 16 months curved around him and his wee yet all-encompassing world, which was all I wanted to do, but then it was time, and now again, it is time. I’ve been taking classes with the lovely Sarah Lochhead and her Barrie dance company Simcoe Contemporary Dancers, remembering that I love to dance, simply and truly, it is my first and longest lasting passion.
I’ve also been taking Moksha Yoga, hot yoga. Which, if you know me, is pretty amusing. Because til now I’ve liked yoga but never gone way out of my way for it, and I h-a-t-e heat. Being overheated is just about my worst nightmare. But I thought I’d give it the old college try for the introductory month and (in my face) I love it. Absolutely. It’s been a revelation to find myself so fully and quickly, strength and flexibility roaring back into my limbs and core. It’s also resulting in some mental serenity here and there, a good balance with the mothering all day and the sewing in stolen moments.
So I’ve been threading the needle on my machine and also “threading the needle” (a tangled-leg hip-opening stretch!) a lot of late and feeling good for it on both fronts. Stay tuned, the needle threading is resulting in some lovely burping pads for my Etsy store, due to open next week!
Happy Valentine’s Day! Yes, the big V day is here and I do so love to embrace the day of love, not so much in the couple-y sense, but in the wider, appreciating the people and things around me sort of a way.
And it inspires all sorts of craftiness in people far and wide, which is so excellent!
I, along with the rest of the crafty world, have fallen for buntings in the past couple of years and envisioned this one just last week while standing in front of the paint samples at Rona. Didn’t know if I’d have time to make it happen but I squeezed it in, threading hearts in the driveway while my sons pretended to drive in my stationary car (side note/free parenting tip: this is an excellent way to buy some time, just let them sit in the driver’s seat and go go go til they’re spent. If the horn honks, it just spices up the neighbourhood). My husband brought in a couple of snowy, errant hearts that I’d dropped when he came home later, hazards of crafting on the go.
I adore paint samples. The the graduation in colour, the heavy texture of the paper, the free-ness, the often-ridiculous commercial names of the colours. Here are some good ones from this bunting: Irish Rose, Grape Vineyard (is there any other kind?!), Satin Serenade, Ballerina Slipper (waaaay off, much darker than an actual ballerina), Very Pink (in case of confusion), Grape Jamboree, Vintage Violet (exactly as you’d imagine), Strawberry Crush, Frankly Scarlet (could you settle for any other red after reading that?), Valhalla (Norse gods always make me think violent fuchsia, of course they do!), Canterbury Lane, Peppermint Pink (nice contrast in terms), Redfeather, Purple Polka (I’d take that dance), Vibrato, Regal Robe (just to end on operatic notes). Names aside, I simply find paint samples satisfying to look at. Plus they are a great, free art/crafting resource. One that I take liberal advantage of.
Here’s alittlehow–to:
1: get yourself a big stack of purple and pink paint samples
2: cut out a heart template that fits on your paint sample. Since my samples were rectangle, I made a heart that fit twice on each page
3: cut out a lot of hearts!
4: hole punch 2 holes in each heart (that sounds so harsh!), one in each hump (that word alway sounds dirty to me …)
5: thread a ribbon or a piece of bias tape — I found some excess burgundy bias tape lying around that did the trick — and cut to desired length
6: thread ribbon through holes in hearts starting from back-to-front so that the heart looks “stitched” across the two humps
7: et voilà! Valentine bunting! And you can store it away for next year, leaving time for new love crafts …
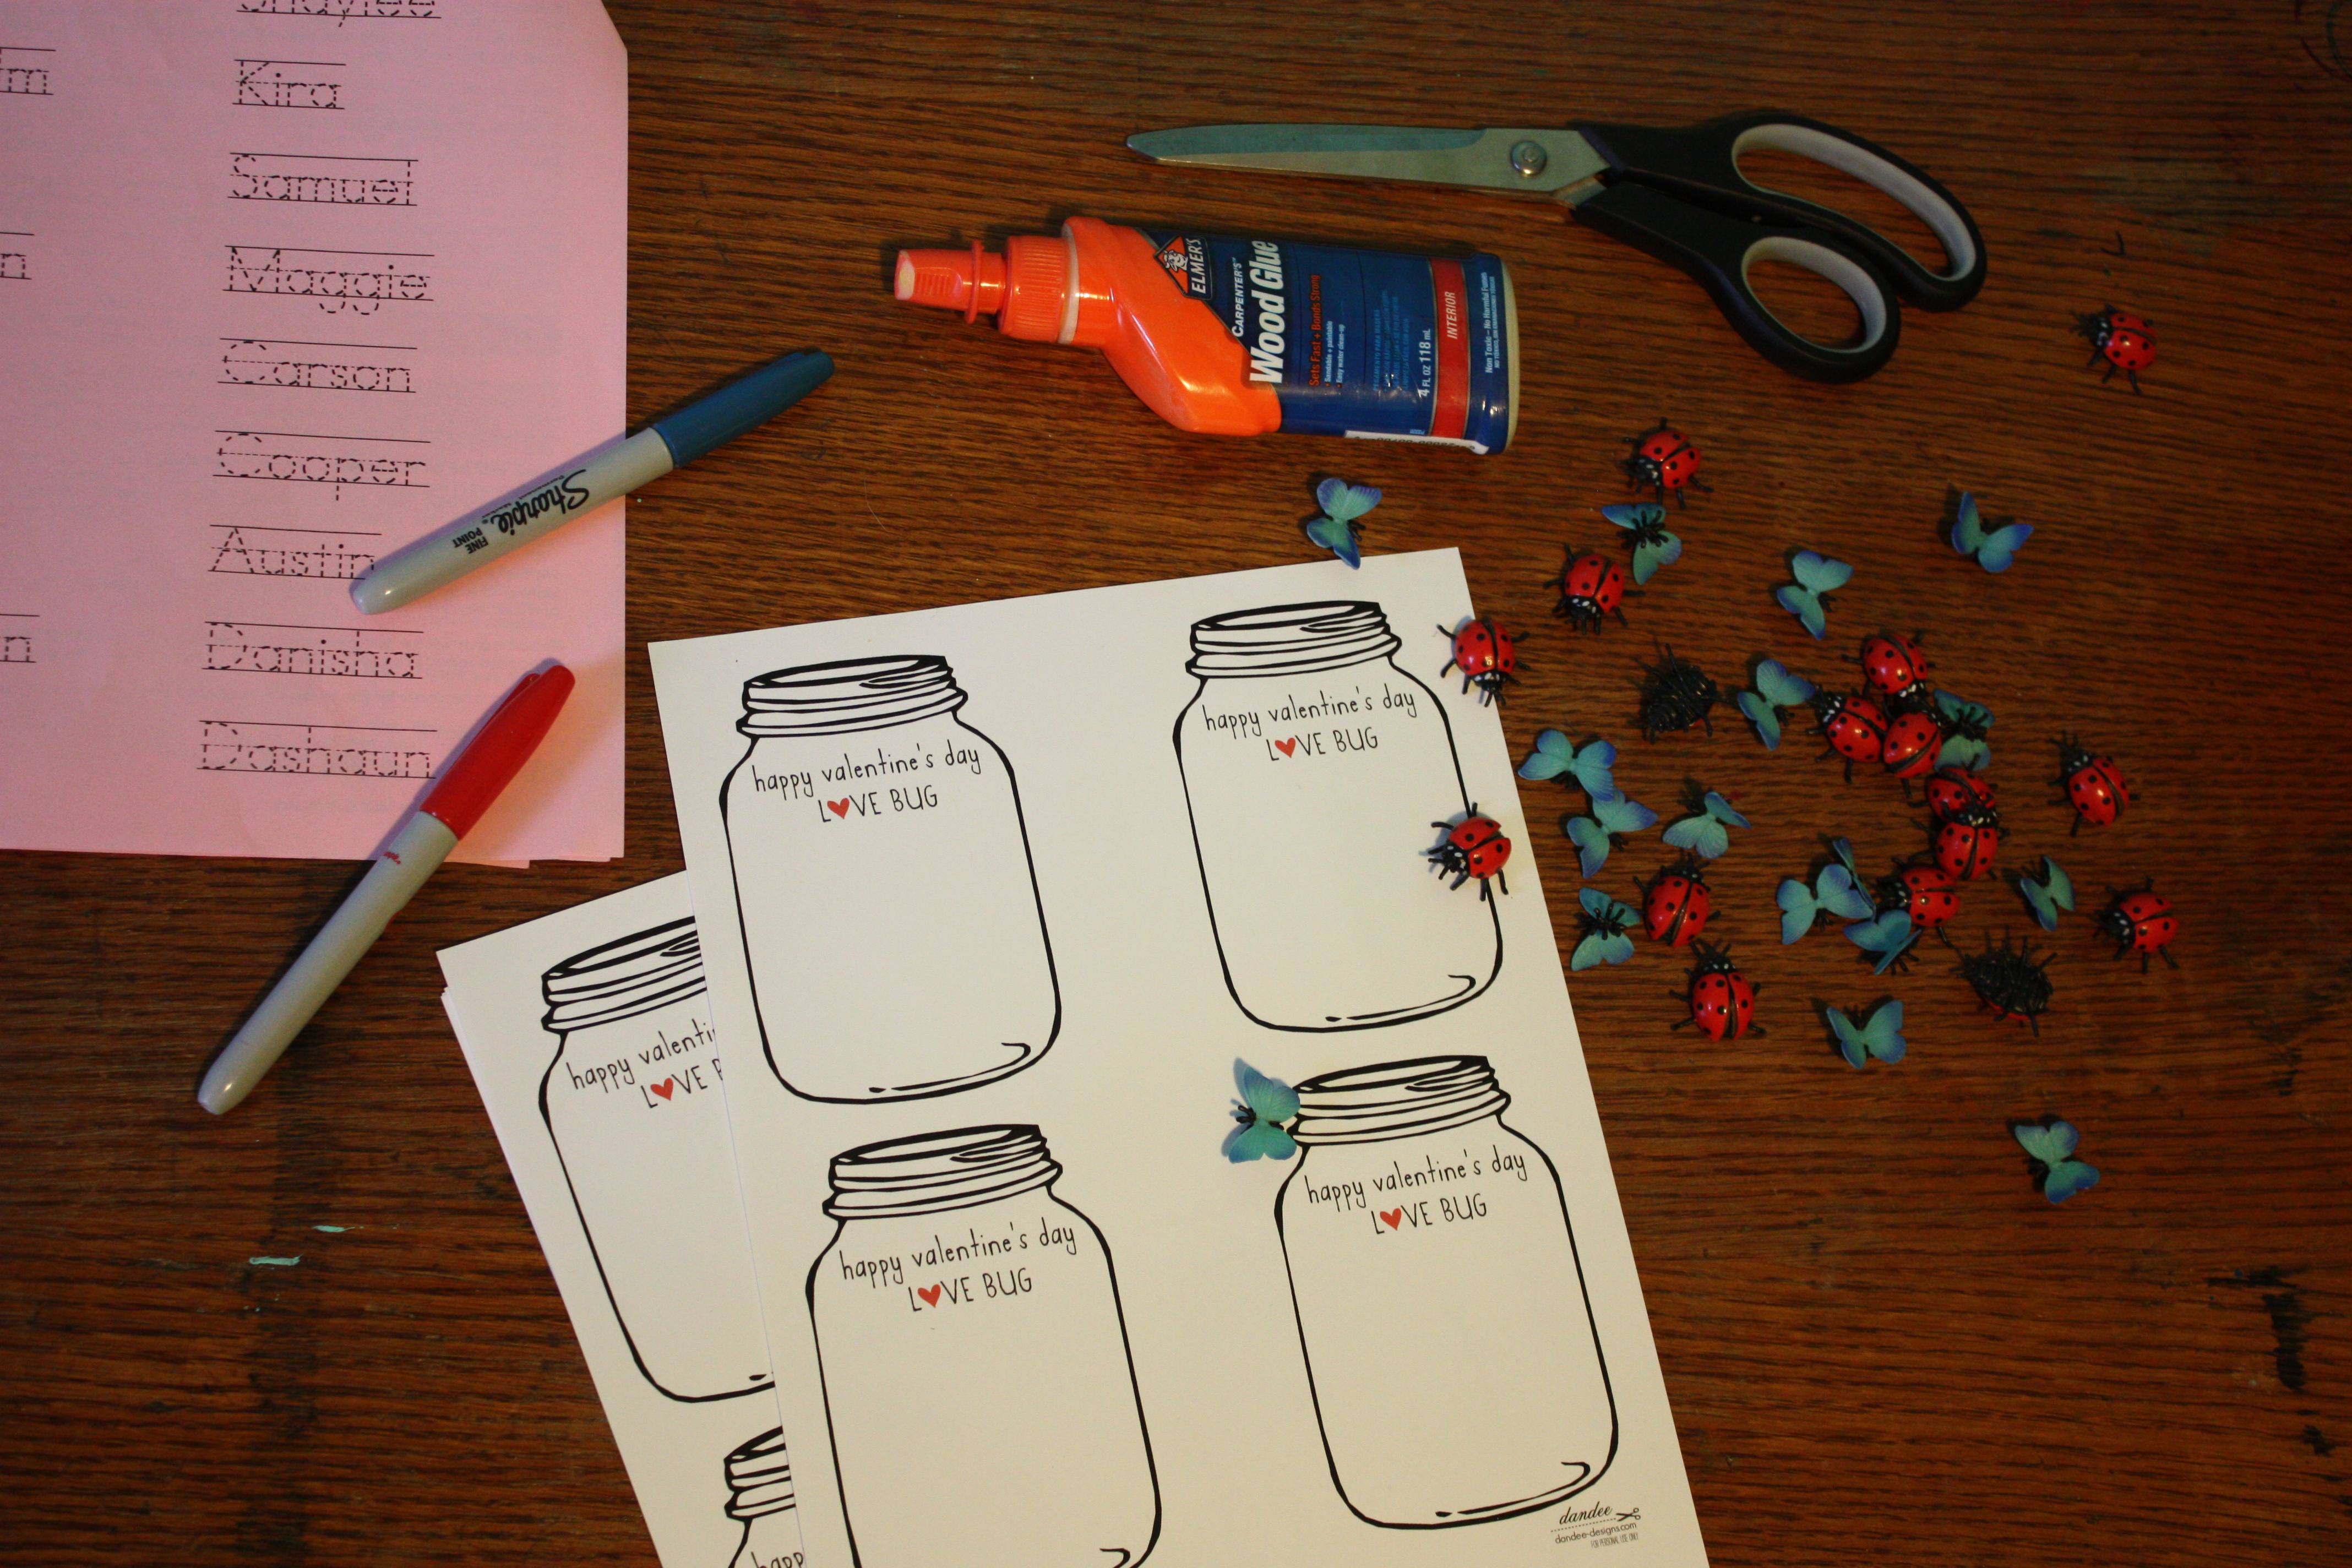
With Rudi in his first year of school, sharing Valentine cards en mass is suddenly an important issue in our household! I took to the internet searching for a non-commercial, non-saccharine option and I found this wonderful Love Bug Jar idea from Danyelle at Dandee Designs, who generously shared her template with the world (I highly recommend checking it out immediately).
Rudi is very excited about writing, he can make most letters, uppercase and lower, from memory when I recite them out loud to him in the order of a name, which totally, utterly astounds me. Such fast learning. Oh to be four!
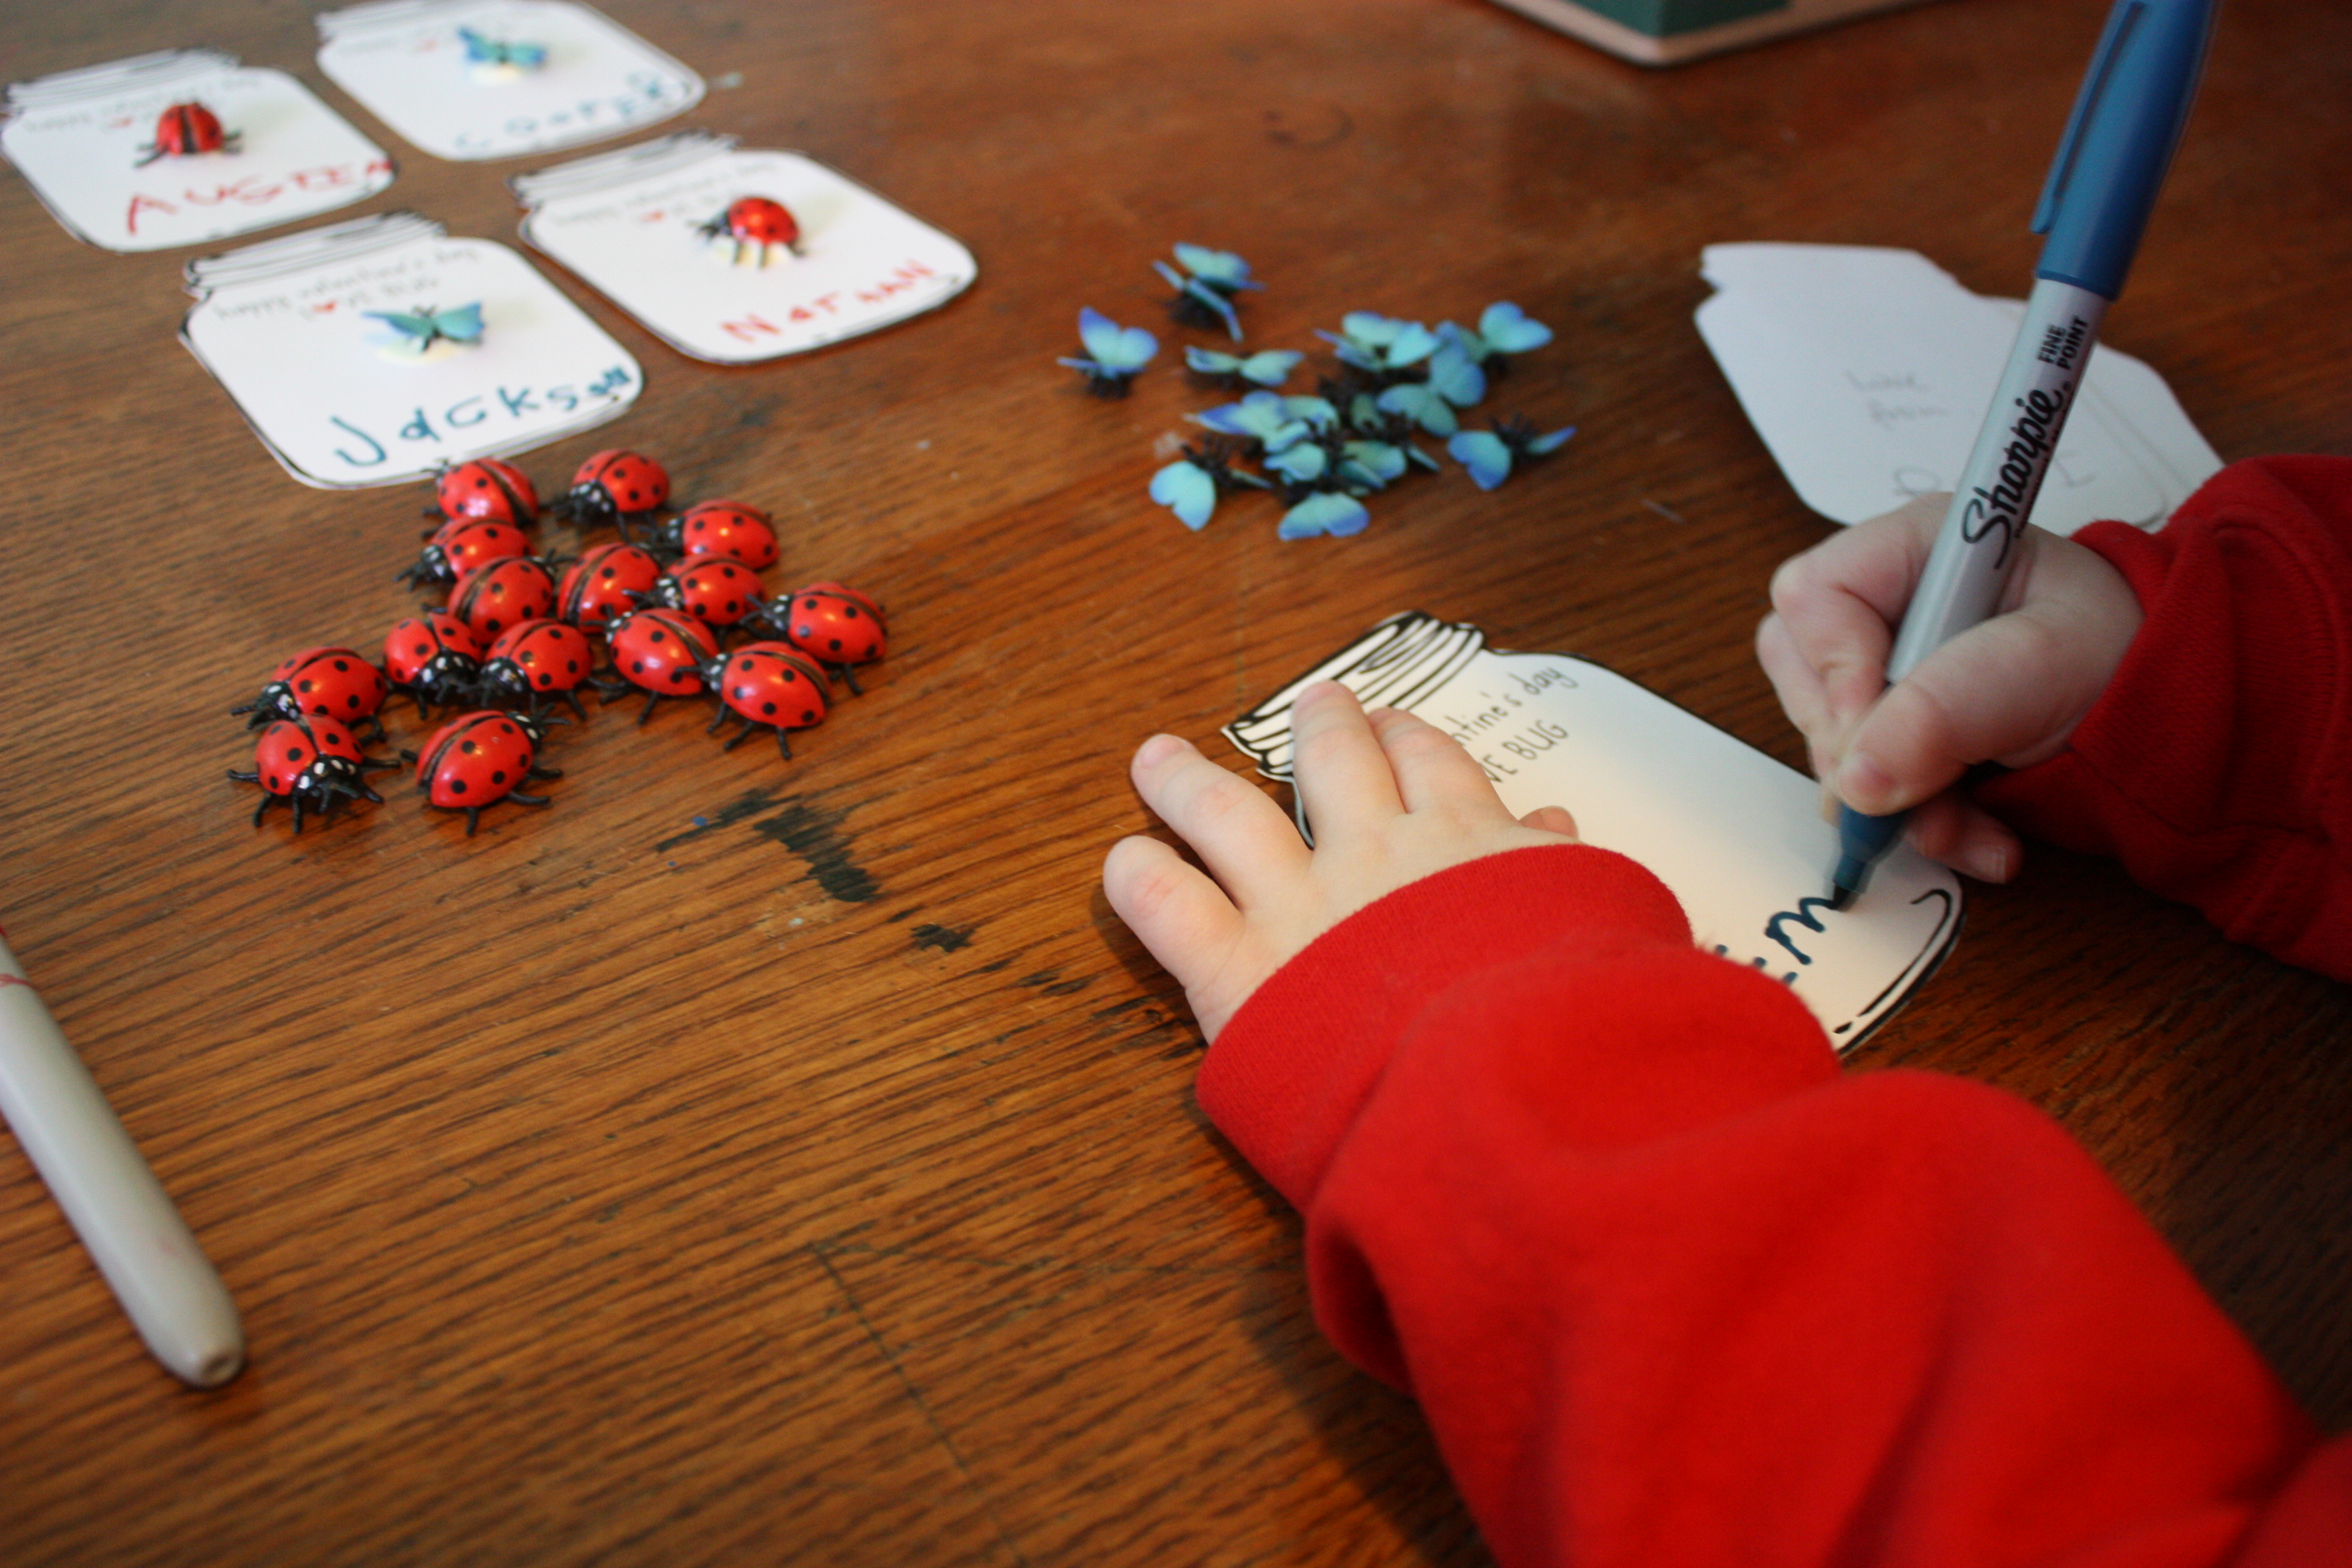
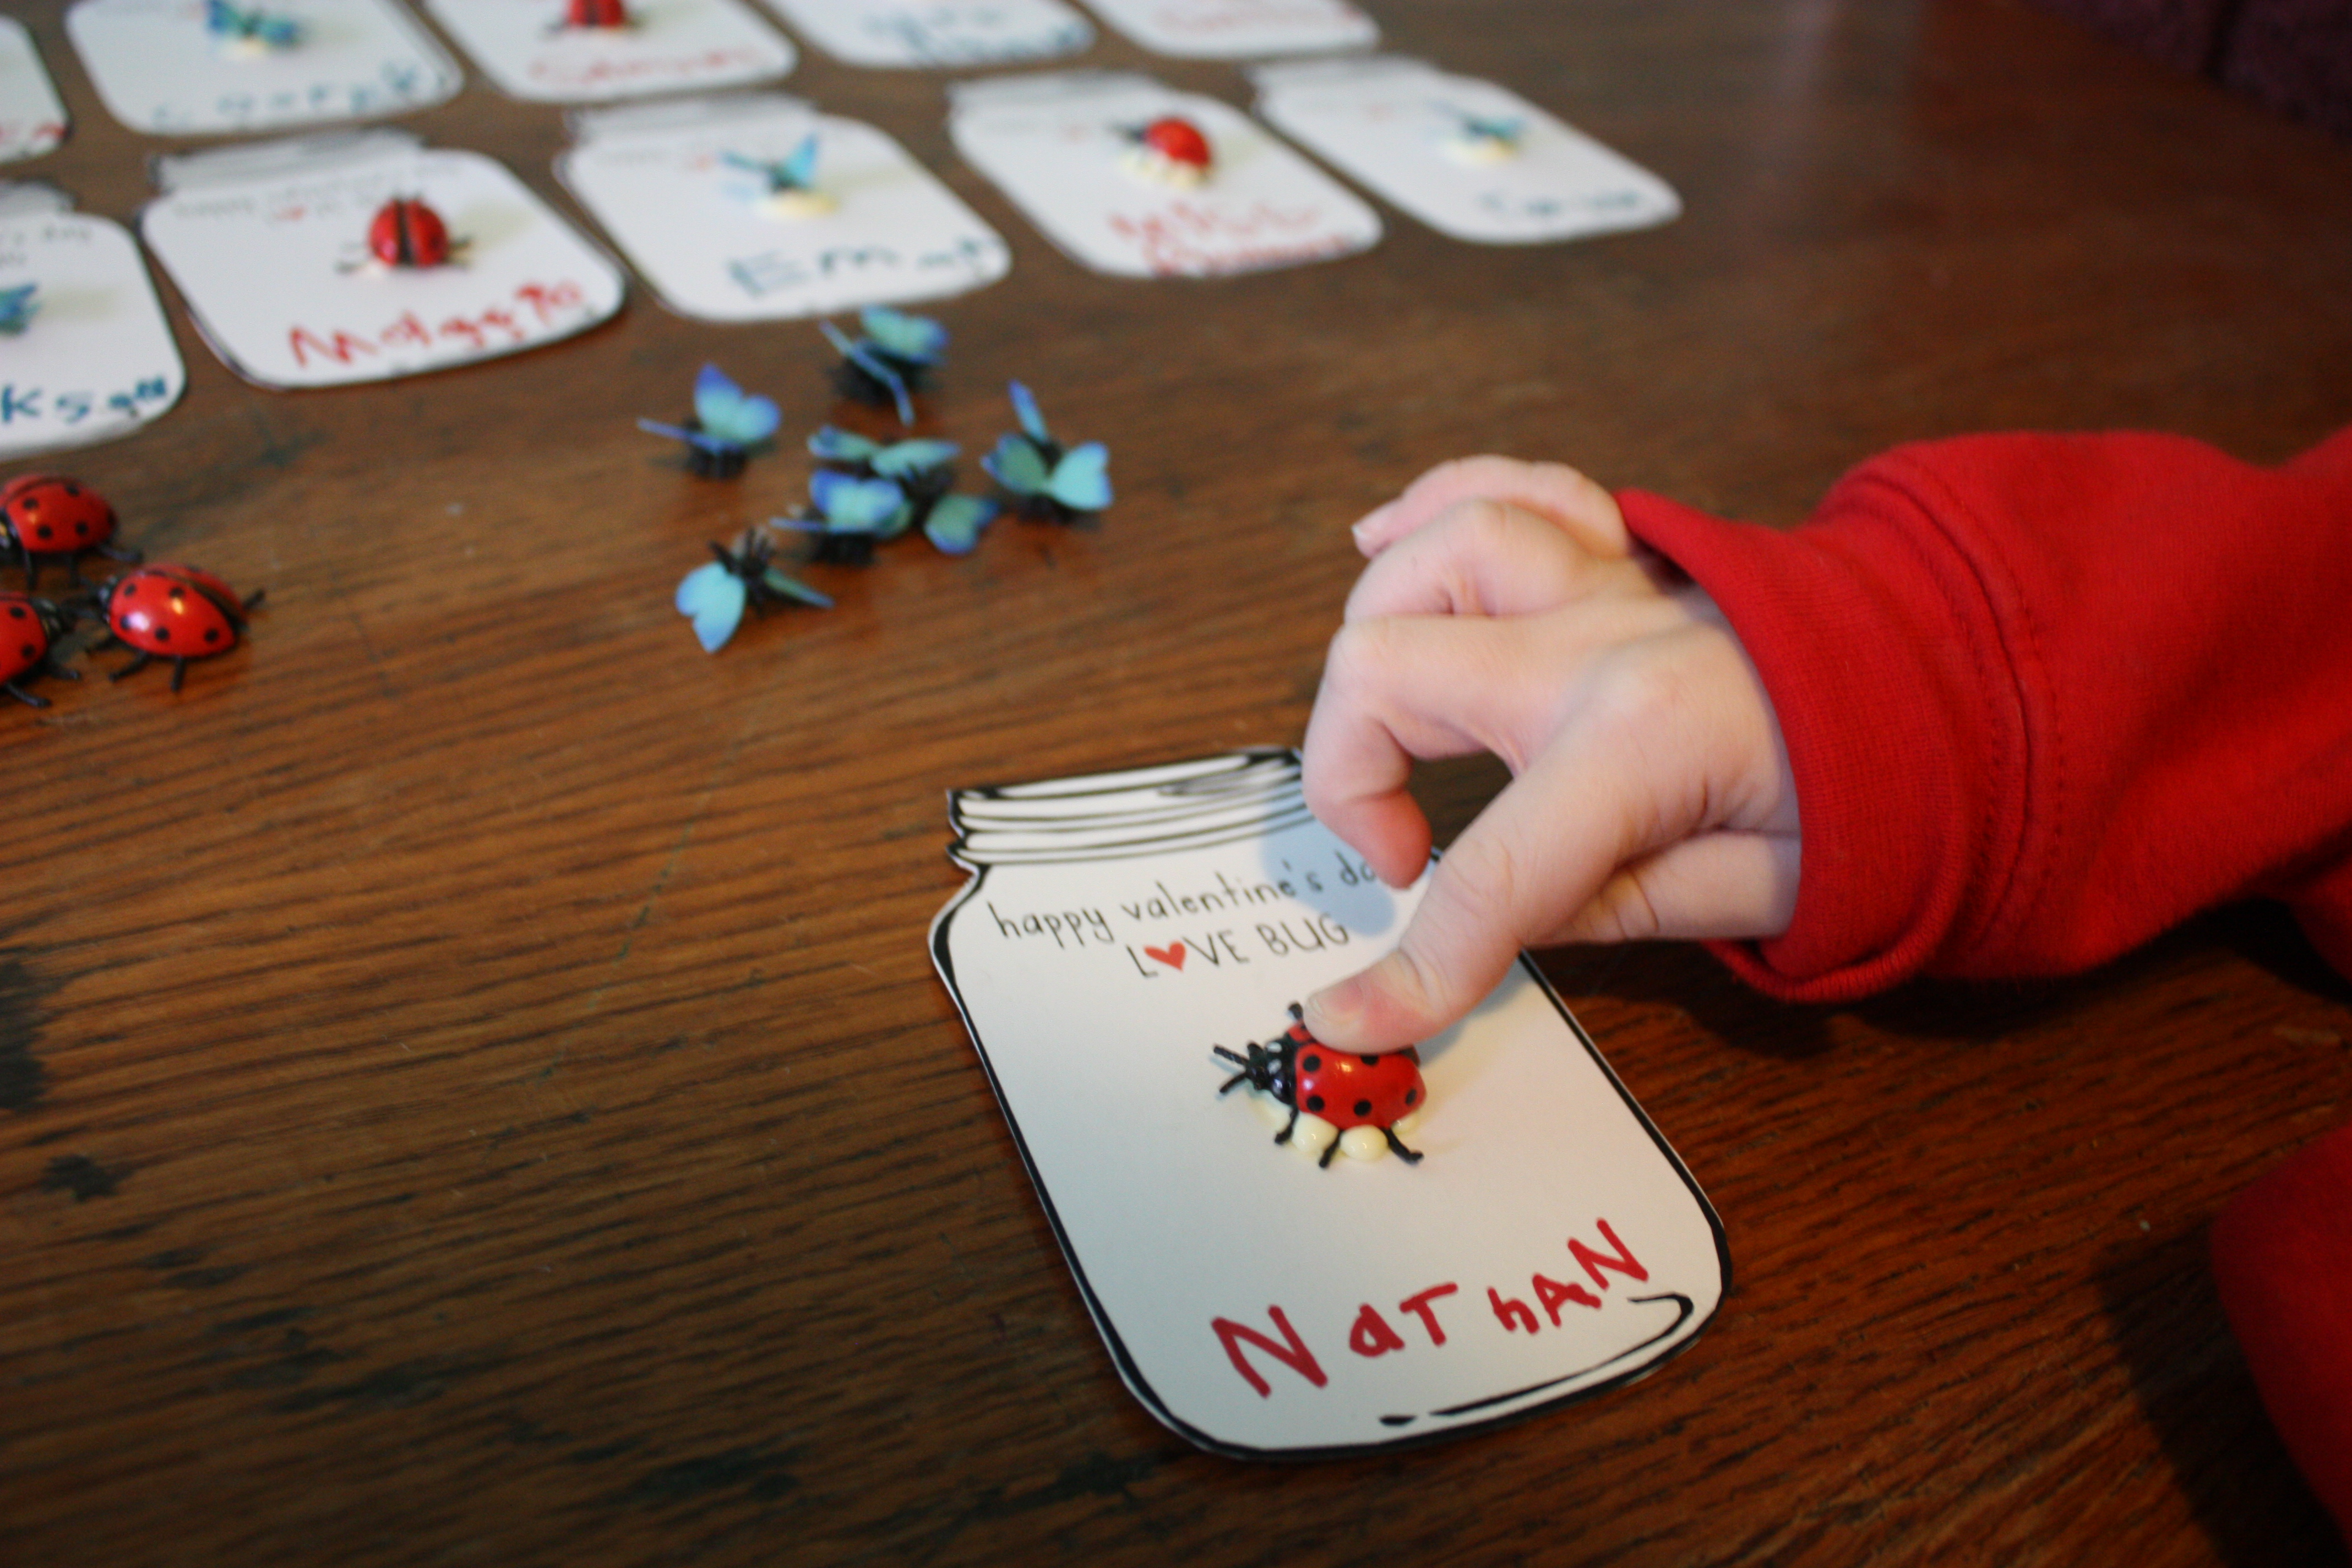
He was very taken with the bug idea but didn’t want any “creepy” bugs, so we went with butterflies and ladybugs. He toiled away, writing his name on the back of each jar (after a love from by me because he declared that to be “too many words for a boy to write.”) and wrote the recipient names on every single jar card in just two sittings. So proud I have a major crafty-boy with super-craft-stamina on my hands!
He loved the glueing. I accidentally used wood glue that I thought was craft glue so it looks yellow — I guess that can be the creepy bit on these cards, and Rudi doesn’t care! I’d put a dot of glue down and he’d carefully place the bug, deciding out-loud which way it should face. He also decided we should use the same ink as colour of bug. I’d suggested opposite colours but he said, “same would be better for sure.” Fair enough! Ta-da — heaps of wonderful valentines for the class, now we’re working on more for cousins and friends.
—-
And a little added love bonus from my friend Lindsay and her project The Love Lettering Project: she’ll send you a package of letters so you can spread your own anonymous love letters to the people, places, things that you love! You should totally do it! Click on the photo for more info:
Today I am 1! Or rather, this blog areI are 1. I find that my usually-verbose self is quiet, not much to say of late, lots of percolating. And having moved to a new city and a new house over the holidays, I seem to have a moving/displacement hangover that’s taking a while to lift — probably the time of year too, I just want to hibernate, sigh. But alas, I am not a Bear and so I solider on!
I am putting the finishing touches on my work space, the room-of-my-own that I am still silly with excitement over! Here’s Rudi helping me put paint to wall. I’ll share when it’s all done. And once it’s done, then the work really begins, creating stock, opening shop, joining craft fairs. It’s a big year ahead, I’m scared and excited and ready, especially since I put this plan on ice in September for the move. So I am ready to work … if I could only get over this hibernation hump : )
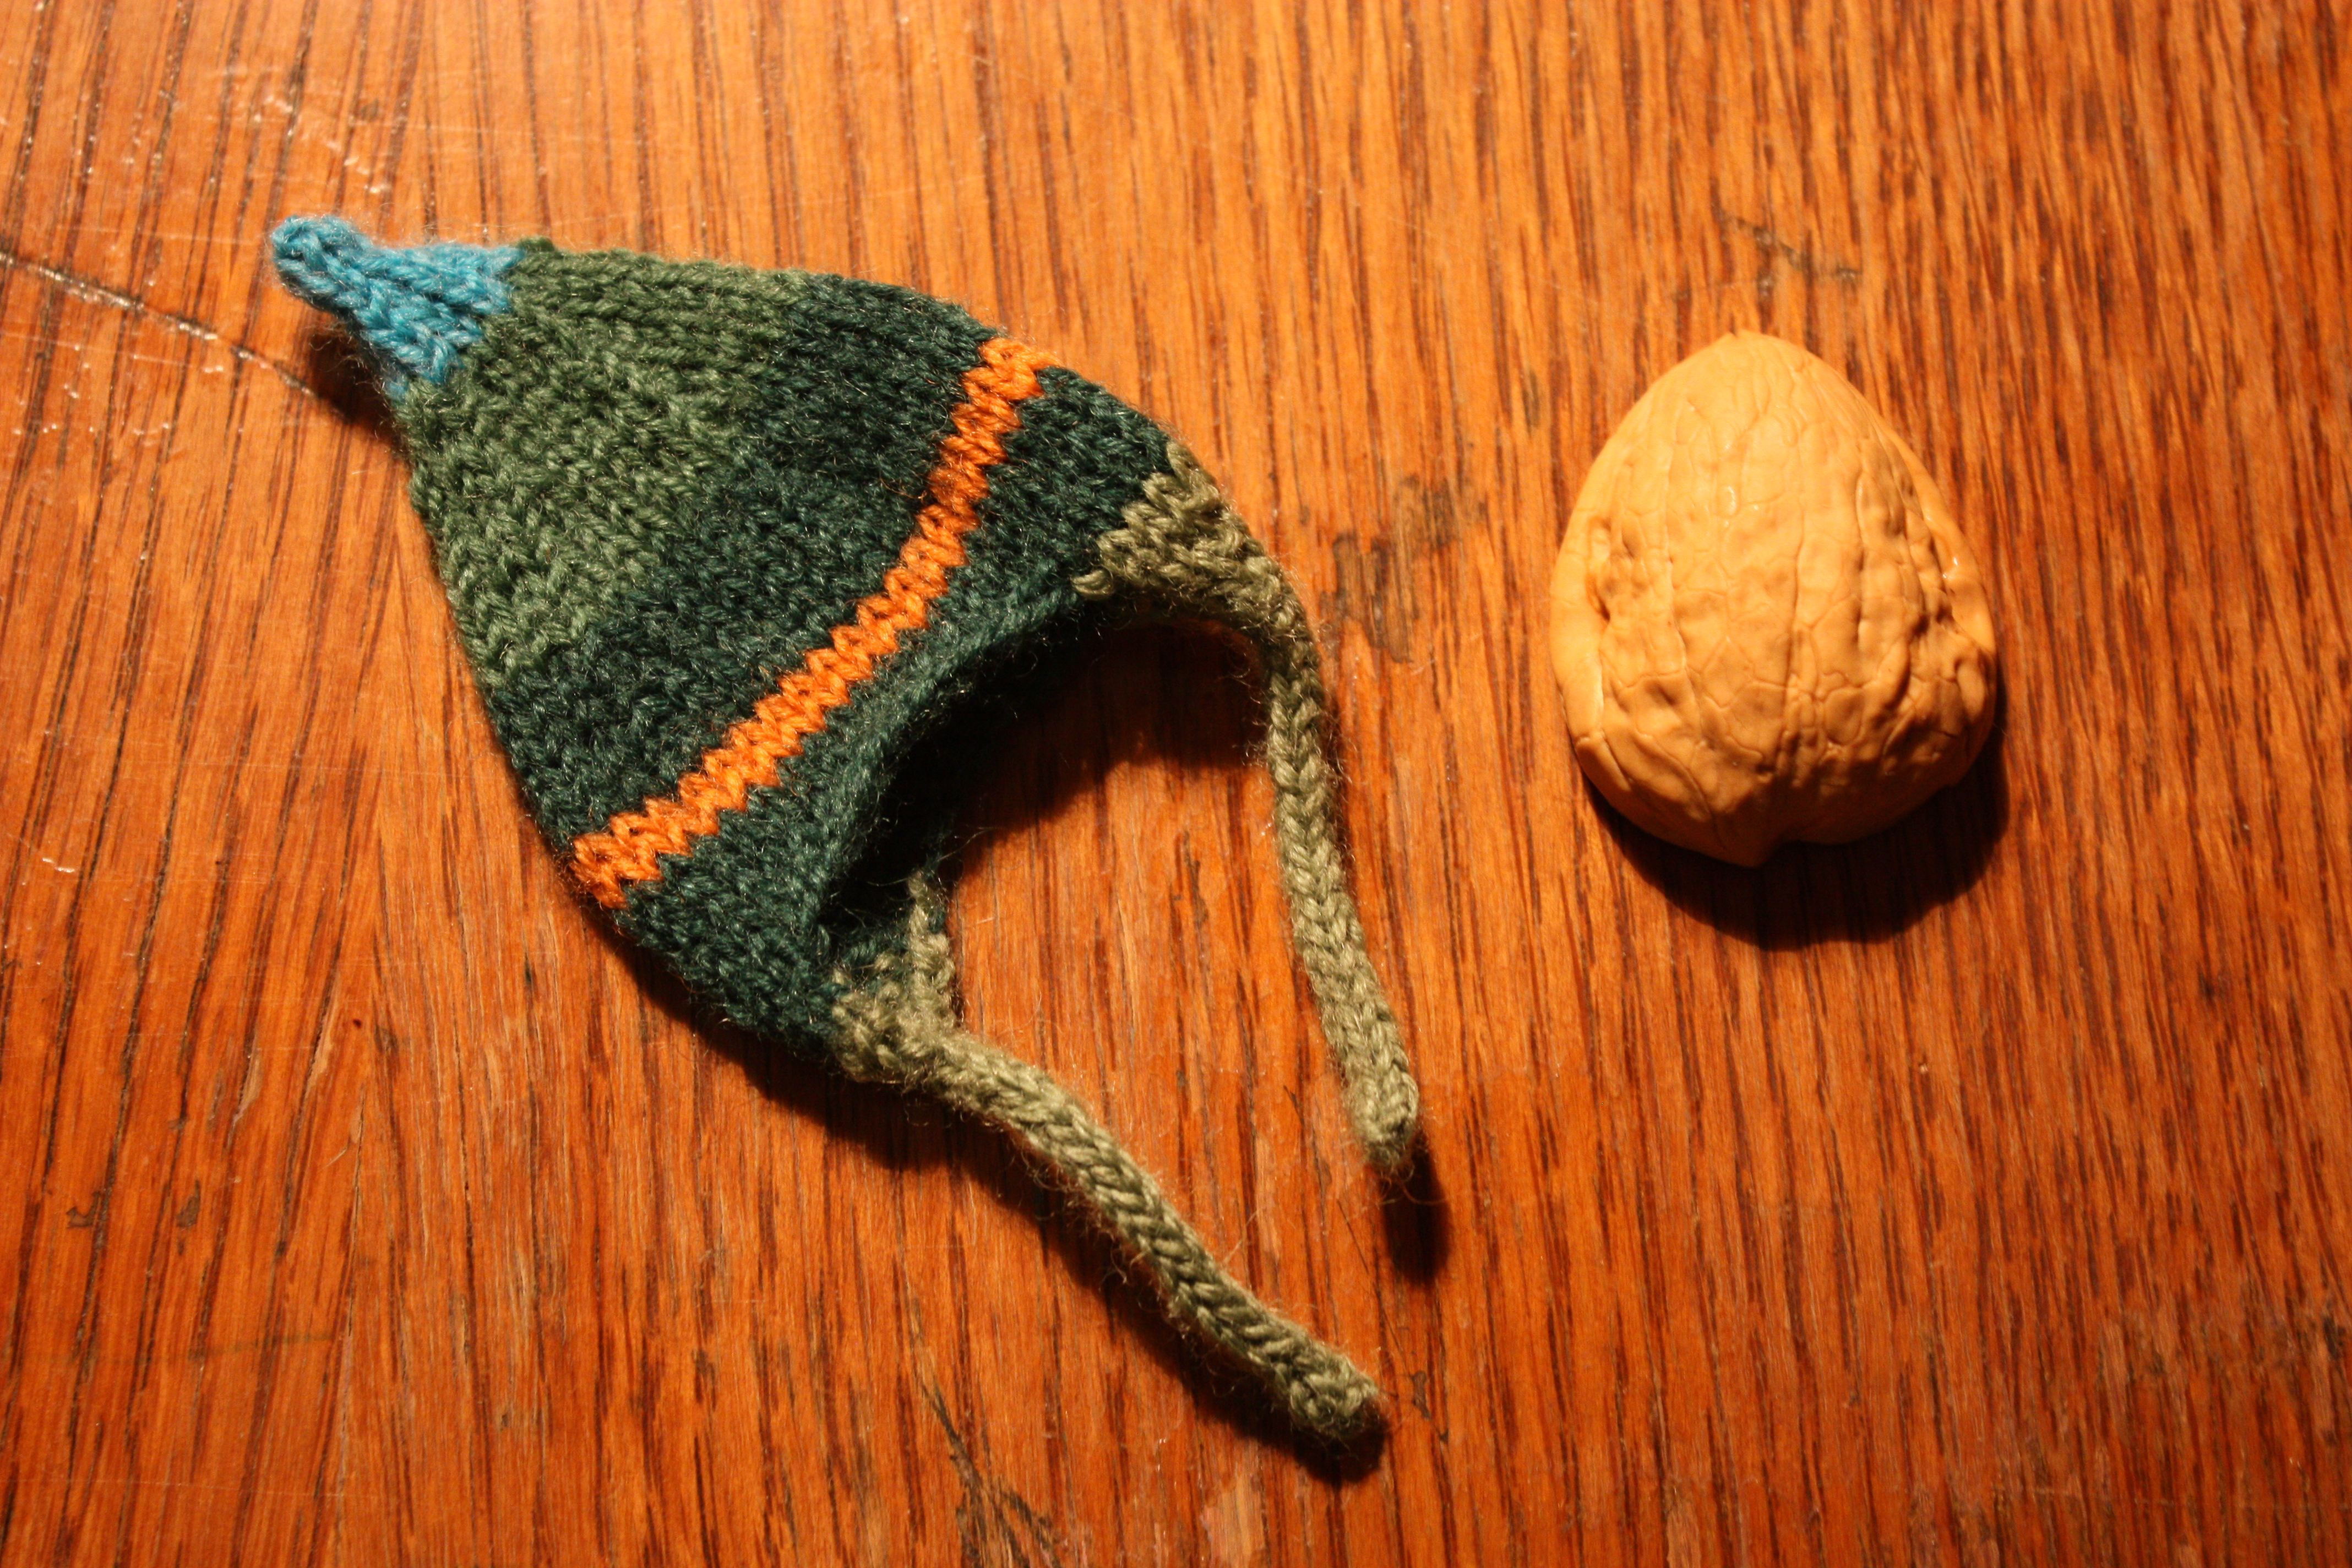
My first post of 2013! And almost a year of blogging for me. This is the story of a Christmas project I undertook in July during our road trip from Southern Ontario to Alberta and back again. Because sometimes I am awesome I had the presence of mind to take yarn and needles in the midst of getting our family on the road and planned to get most of my xmas gifts done whist whiling away the miles with my favourite pastime.
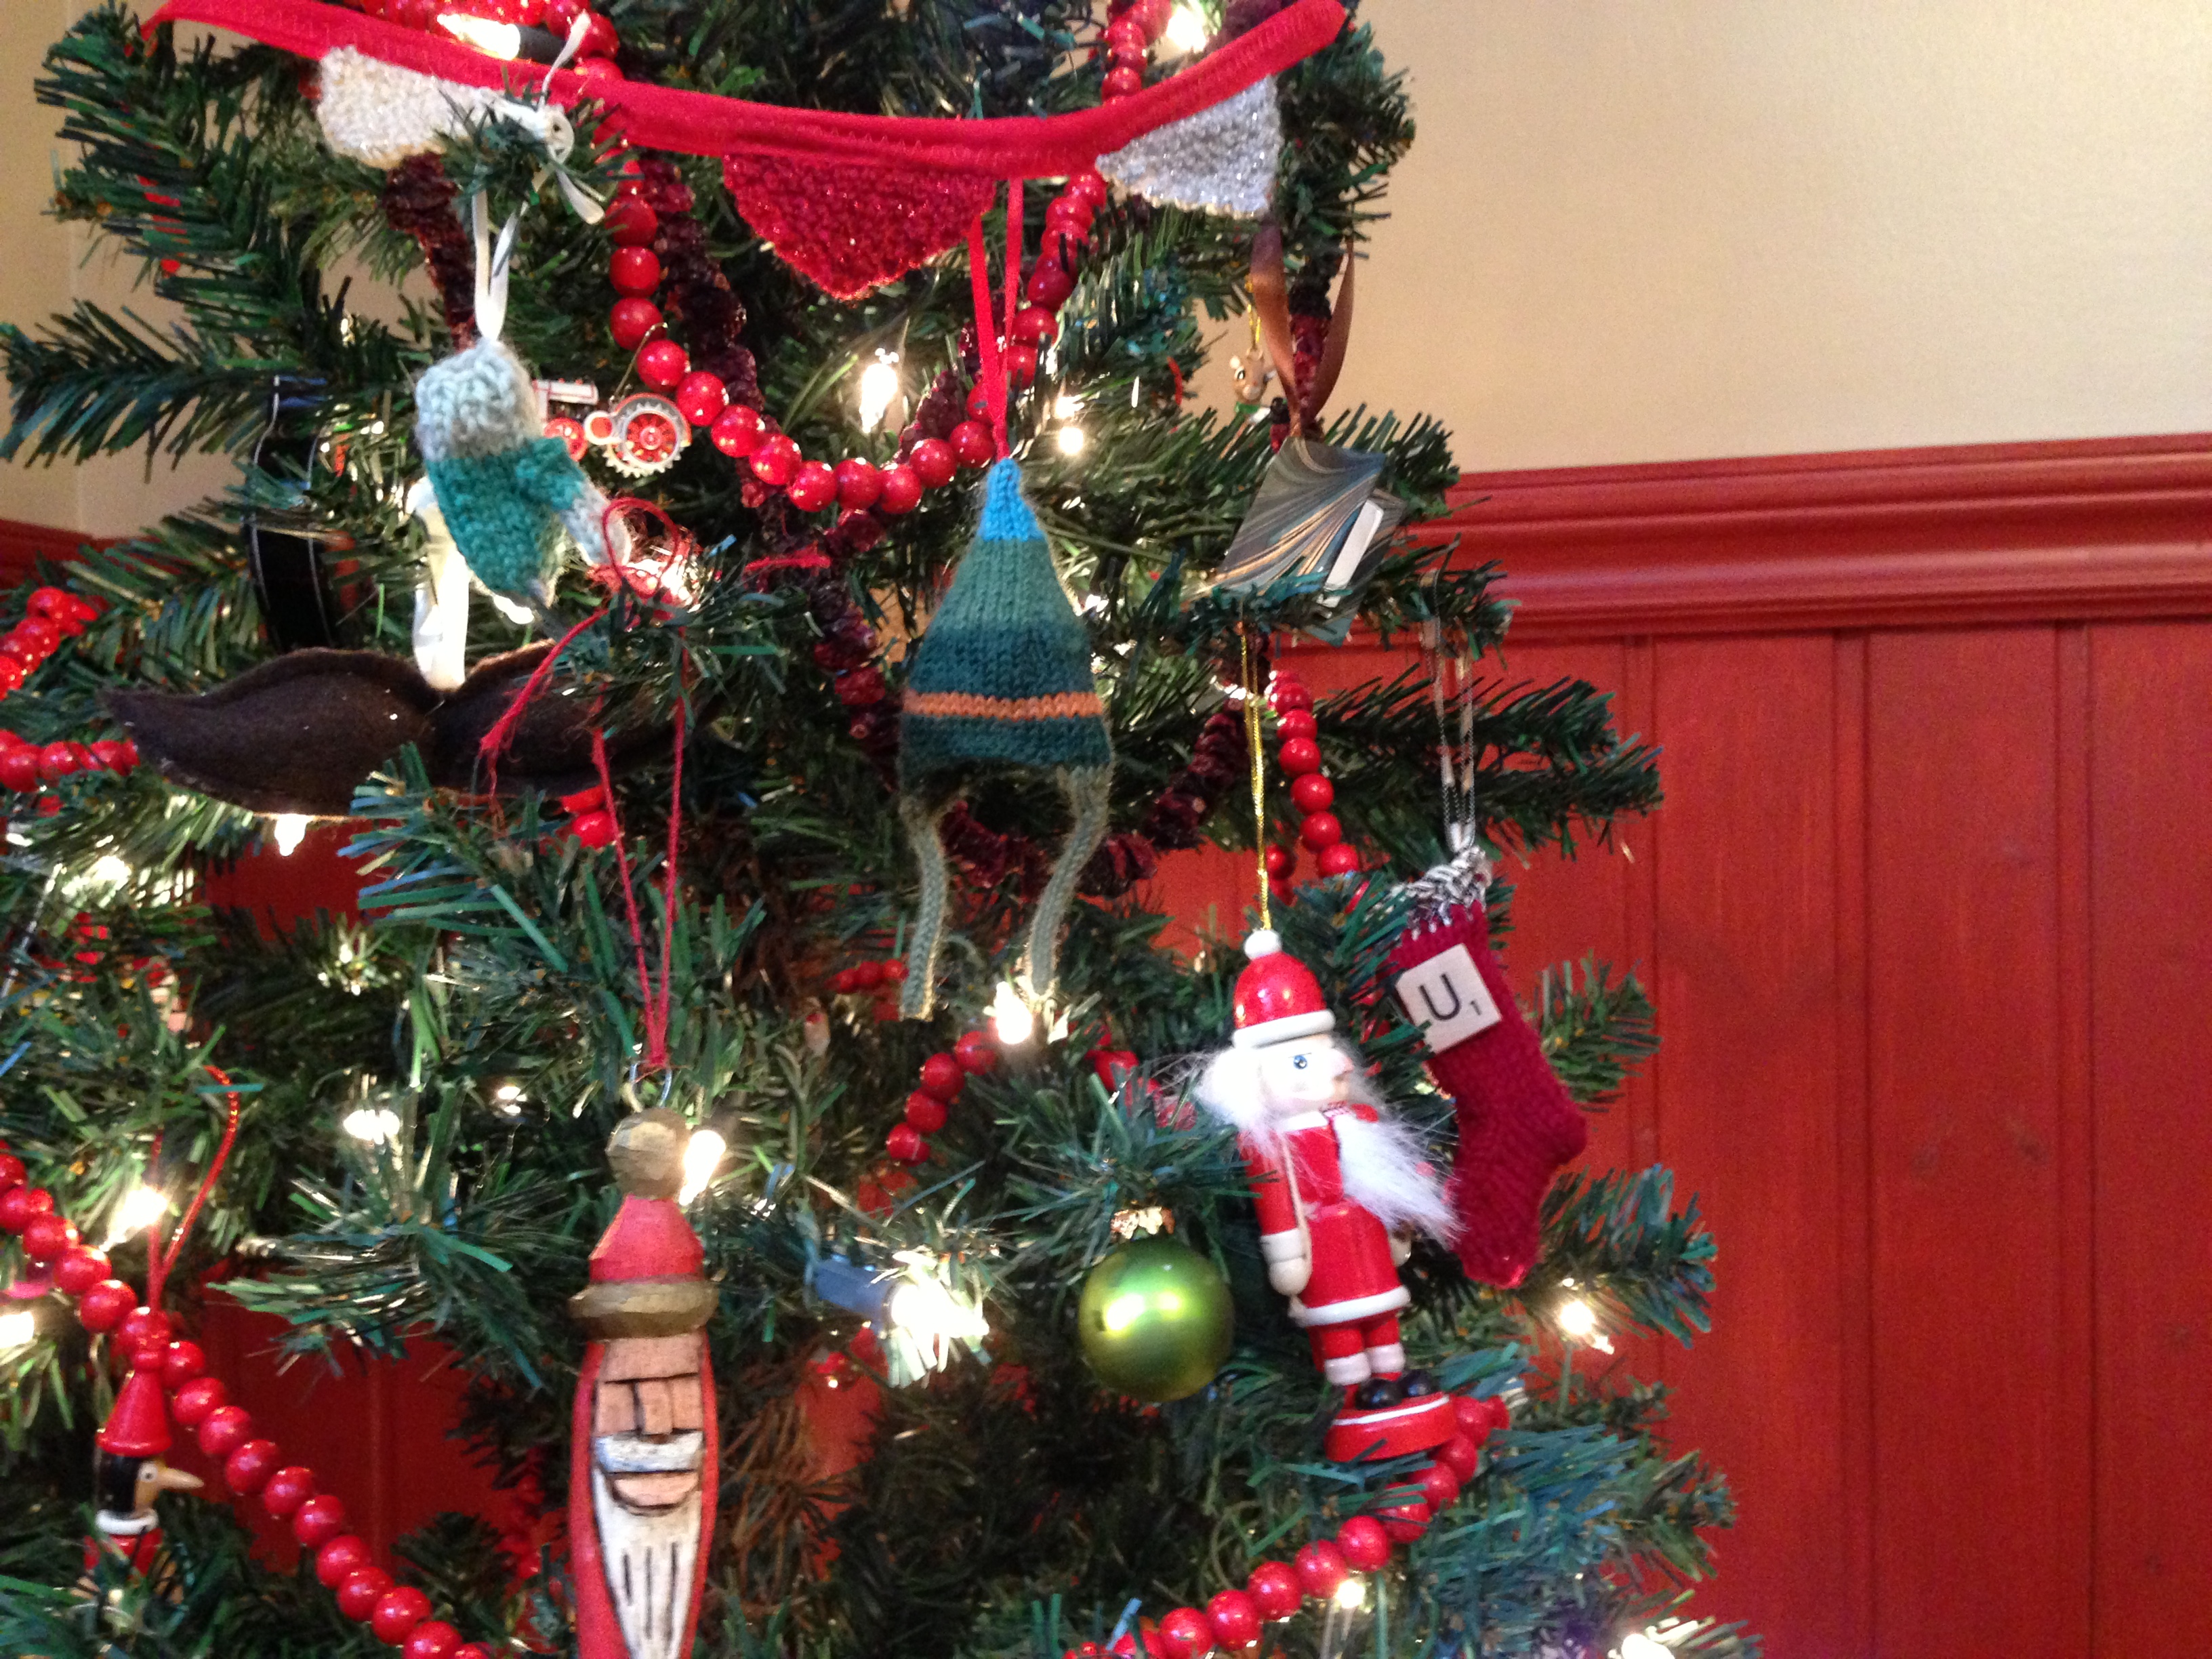
I must say I was inspired by the gifts of my dear friend Christa, who’s been making wee knitted ornaments for years now for her friends. Each piece, a mitten, heart, snowflake, stocking, etc, carries the memories of the christmas it arrived with us and is woven full of the creativity and friendship of the maker.
Flying along an Ontario highway, I fiddled with my pattern for a full-sized hat til I was happy with the scale of the hat. I had the whole trip ahead of me, about 10 days of six-eight hour drives in total.
By the time we hit Michigan I was humming along, the second hat shaping up. After that each one took about two hours. That’s way more than time I’d usually be able to afford, but it was perfect for the road, allowing me to ignore squabbling in the back seat til it was at intervention-pitch and also freeing my mind to sail about as it does while knitting (I’m sure the knitters among you know what I mean!). I finished five-and-a-half hats on the way to Alberta and figured I had about eight more hats in me on the way home. Tiny hats for everyone!
Somewhere between Southern Alberta and the Cypress Hills of Saskatchewan I got back on the knitting-train and finished hat six. Hats seven and eight grew as we flew across the Montana, North Dakota and Minnesota. I was (and I am not exaggerating) six stitches from being done the eighth hat. We were all cranky and we all had to pee. We stopped at a Wisconsin truck stop. We peed. We bought charming state magnets for the states we’d driven through. We got snacks. We watched a biker couple arrive on separate bikes and have a loving exchange that belied their tough-as-nails exteriors. We stretched. We got back in the car.
After a few miles I reached for my knitting. Not at my feet. Not. At. My. Feet. Got a zing of panic through my chest. Tore up my bags, swore a lot (always classy in front of the children, ahem-hem). But that lovely ball of delicate computer-dyed wool, my tiny bamboo needles, and my NEARLY-DONE hat, gone. I must have kicked them out of the car when I got out or in, but I never felt it didn’t see my little knitting lying lonely on the pavement. There was a moment when I could see Adam calculating whether he’d be a happier husband if he turned around … he suggested it was a bit funny and I told him I needed about 35 minutes before it was even remotely funny. There was a lot of deep breathing and muttering from me. Eventually I could laugh, if that was the worst thing that happened on the road, I could take it I decided. I like to think some biker dude with a secret knitting hobby scooped it up and finished it. That’s the story I’m sticking to.
There were less hats than I’d planned for xmas gifting. And I didn’t have the heart or time to make more once we were home. But the ones I did make are probably that much better for the adventure attached to them. So if you received a little hat from me, now you know: it’s part of a pretty exclusive run of seven pieces. Number eight is on a biker’s tree in Wisconsin, I’m sure of it.
Every year I try to make my own cards. I have a weakness for letter pressed cards and could buy them til I’m clean broke! But barring total financial irresponsibility, my irrepressible need to create, and my genuine belief that homemade cards are awesome, I managed to do it this year amongst all the rest of the madness. It was a glorious solo late night pursuit, my favourite kind : )
For the tree bodies, I used these gorgeous scraps of Nigerian fabric from my dear friend (and fellow sewing/fabric nerd!) Jen’s travels in that country. I cut out little pine trees and sewed them down the middle, easy as can be and so pleasing!
I discovered about 2 years ago that one could carve stamps from erasers and have tried it a few times since. So for the trunks I carved a wee eraser-stamp and l-o-v-e how it came out. I find carving incredibly satisfying. I guess I’ll have to tuck that into the drawer of “things I really want to do,” along with pottery on a wheel, letter pressing, silk screening, stained glass, soap making etc … sigh 🙂
Ahhhhhhhh (sigh of comfort and decompression) I am back in the saddle — ish. Actually I’m more clinging to the edge of the saddle on the galloping horse that is my life, but none the less, I am here again. Our computer is set up in this new home on a new street in a new city, the internet is connected and it’s time for a Rearview Friday!
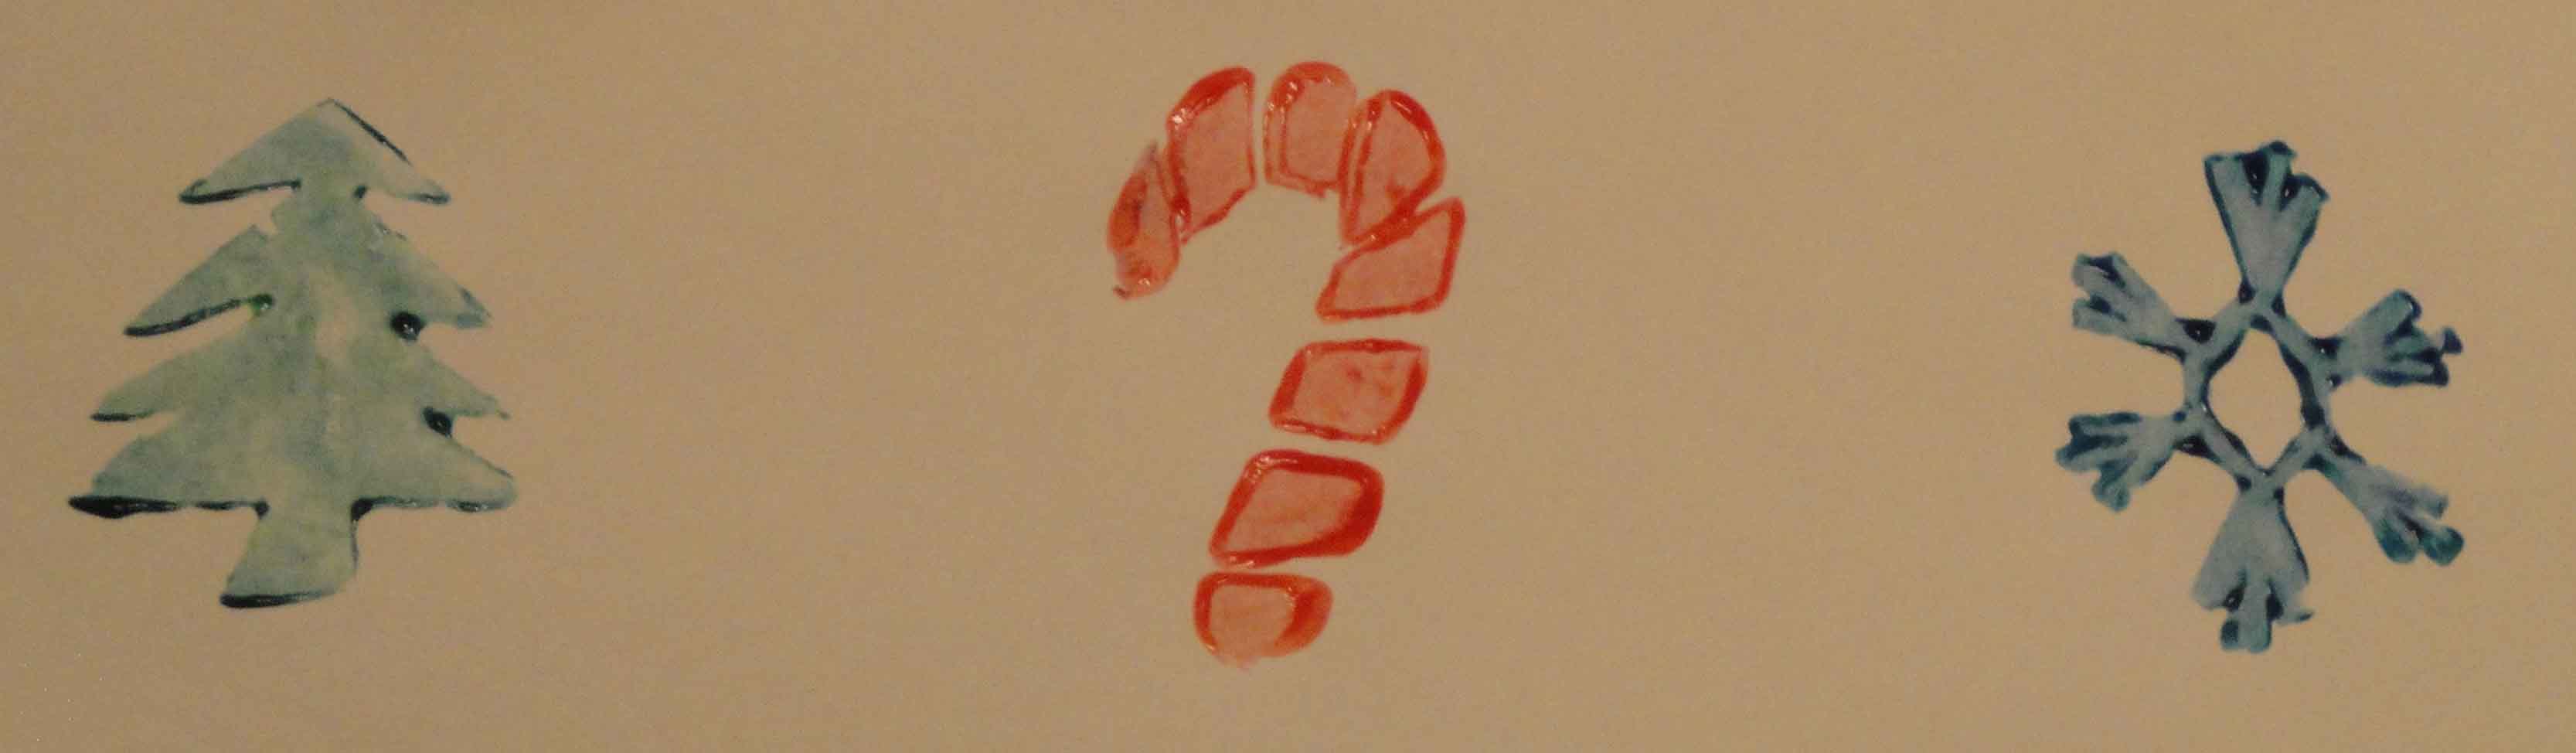
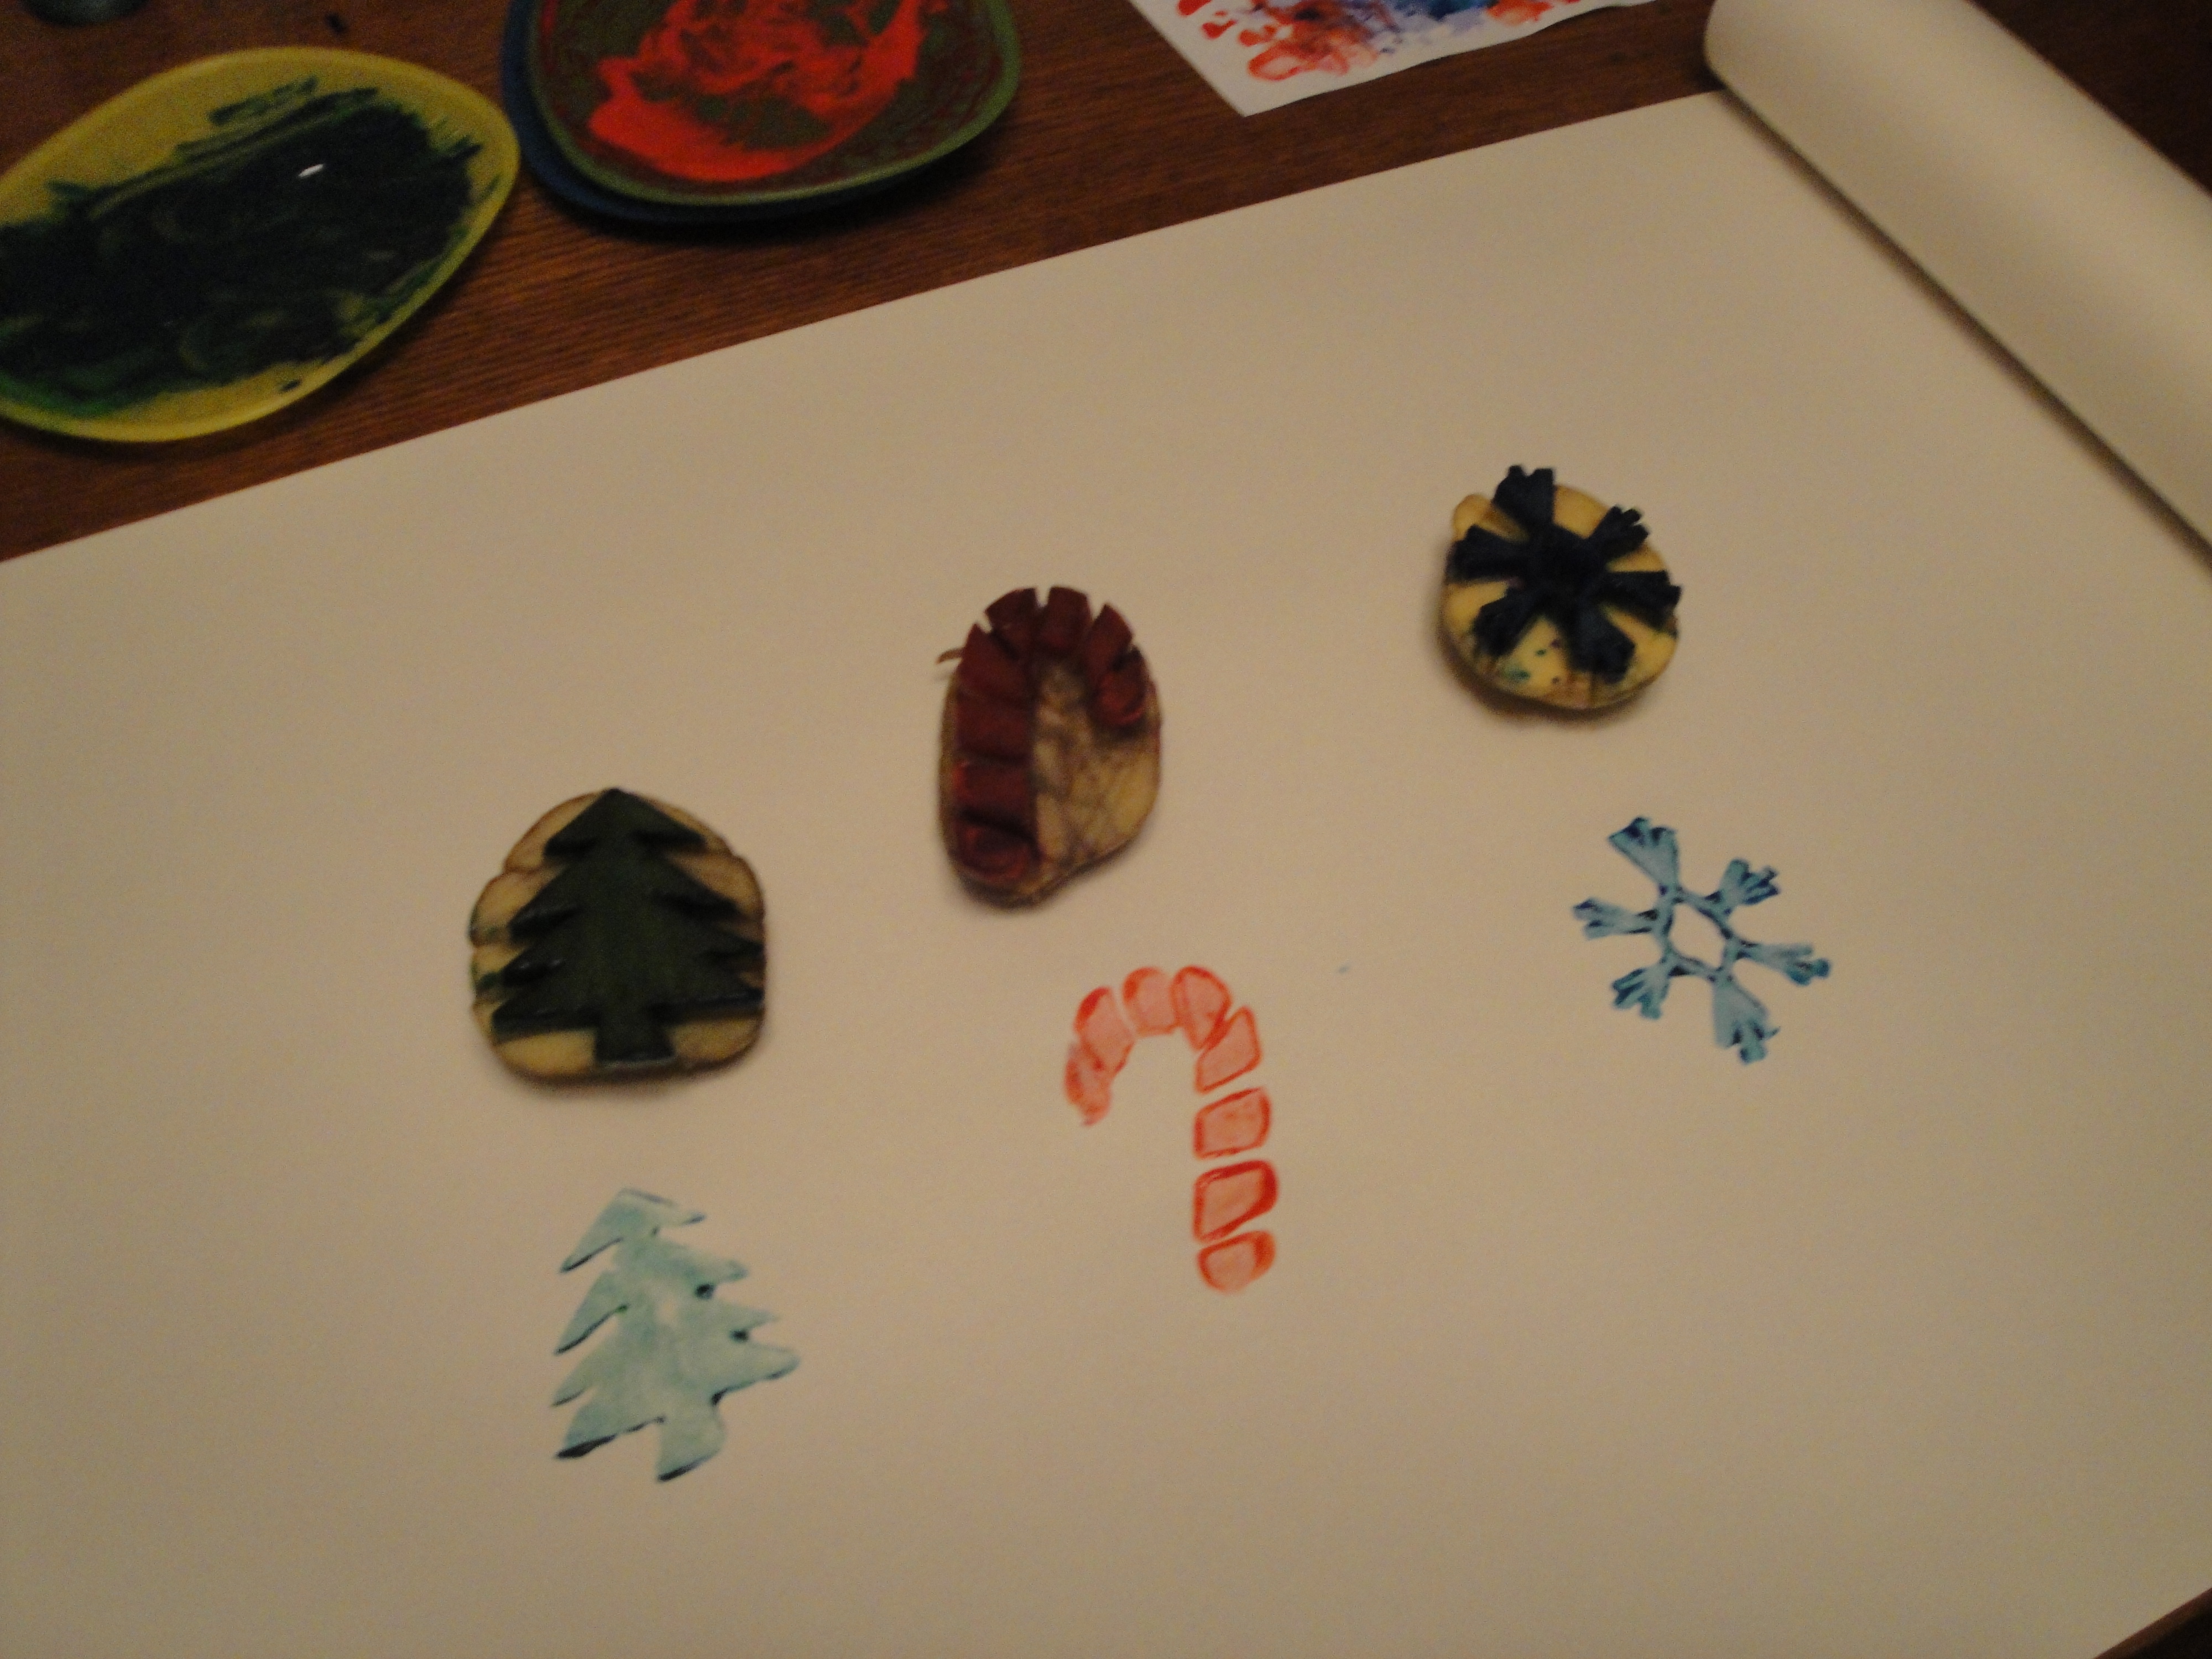
This one I’ve been saving. Last year when I was home on mat leave with then 3-month-old Gene and 3-year-old Rudi we made potato stamp wrapping paper. We had time in the schedule, space on the table and walls (for drying, this is key!) and had a rip-roarin’ good time. I fully plan to do it next year when we are not moving in the middle of the holiday season, whew.
If you can believe it, Miss Crafty 5000 herself had never made potato stamps! So it was time. They were easy to carve and I bought lots of potatoes in case of mistakes. The snowflake was my runaway favourite design in print.
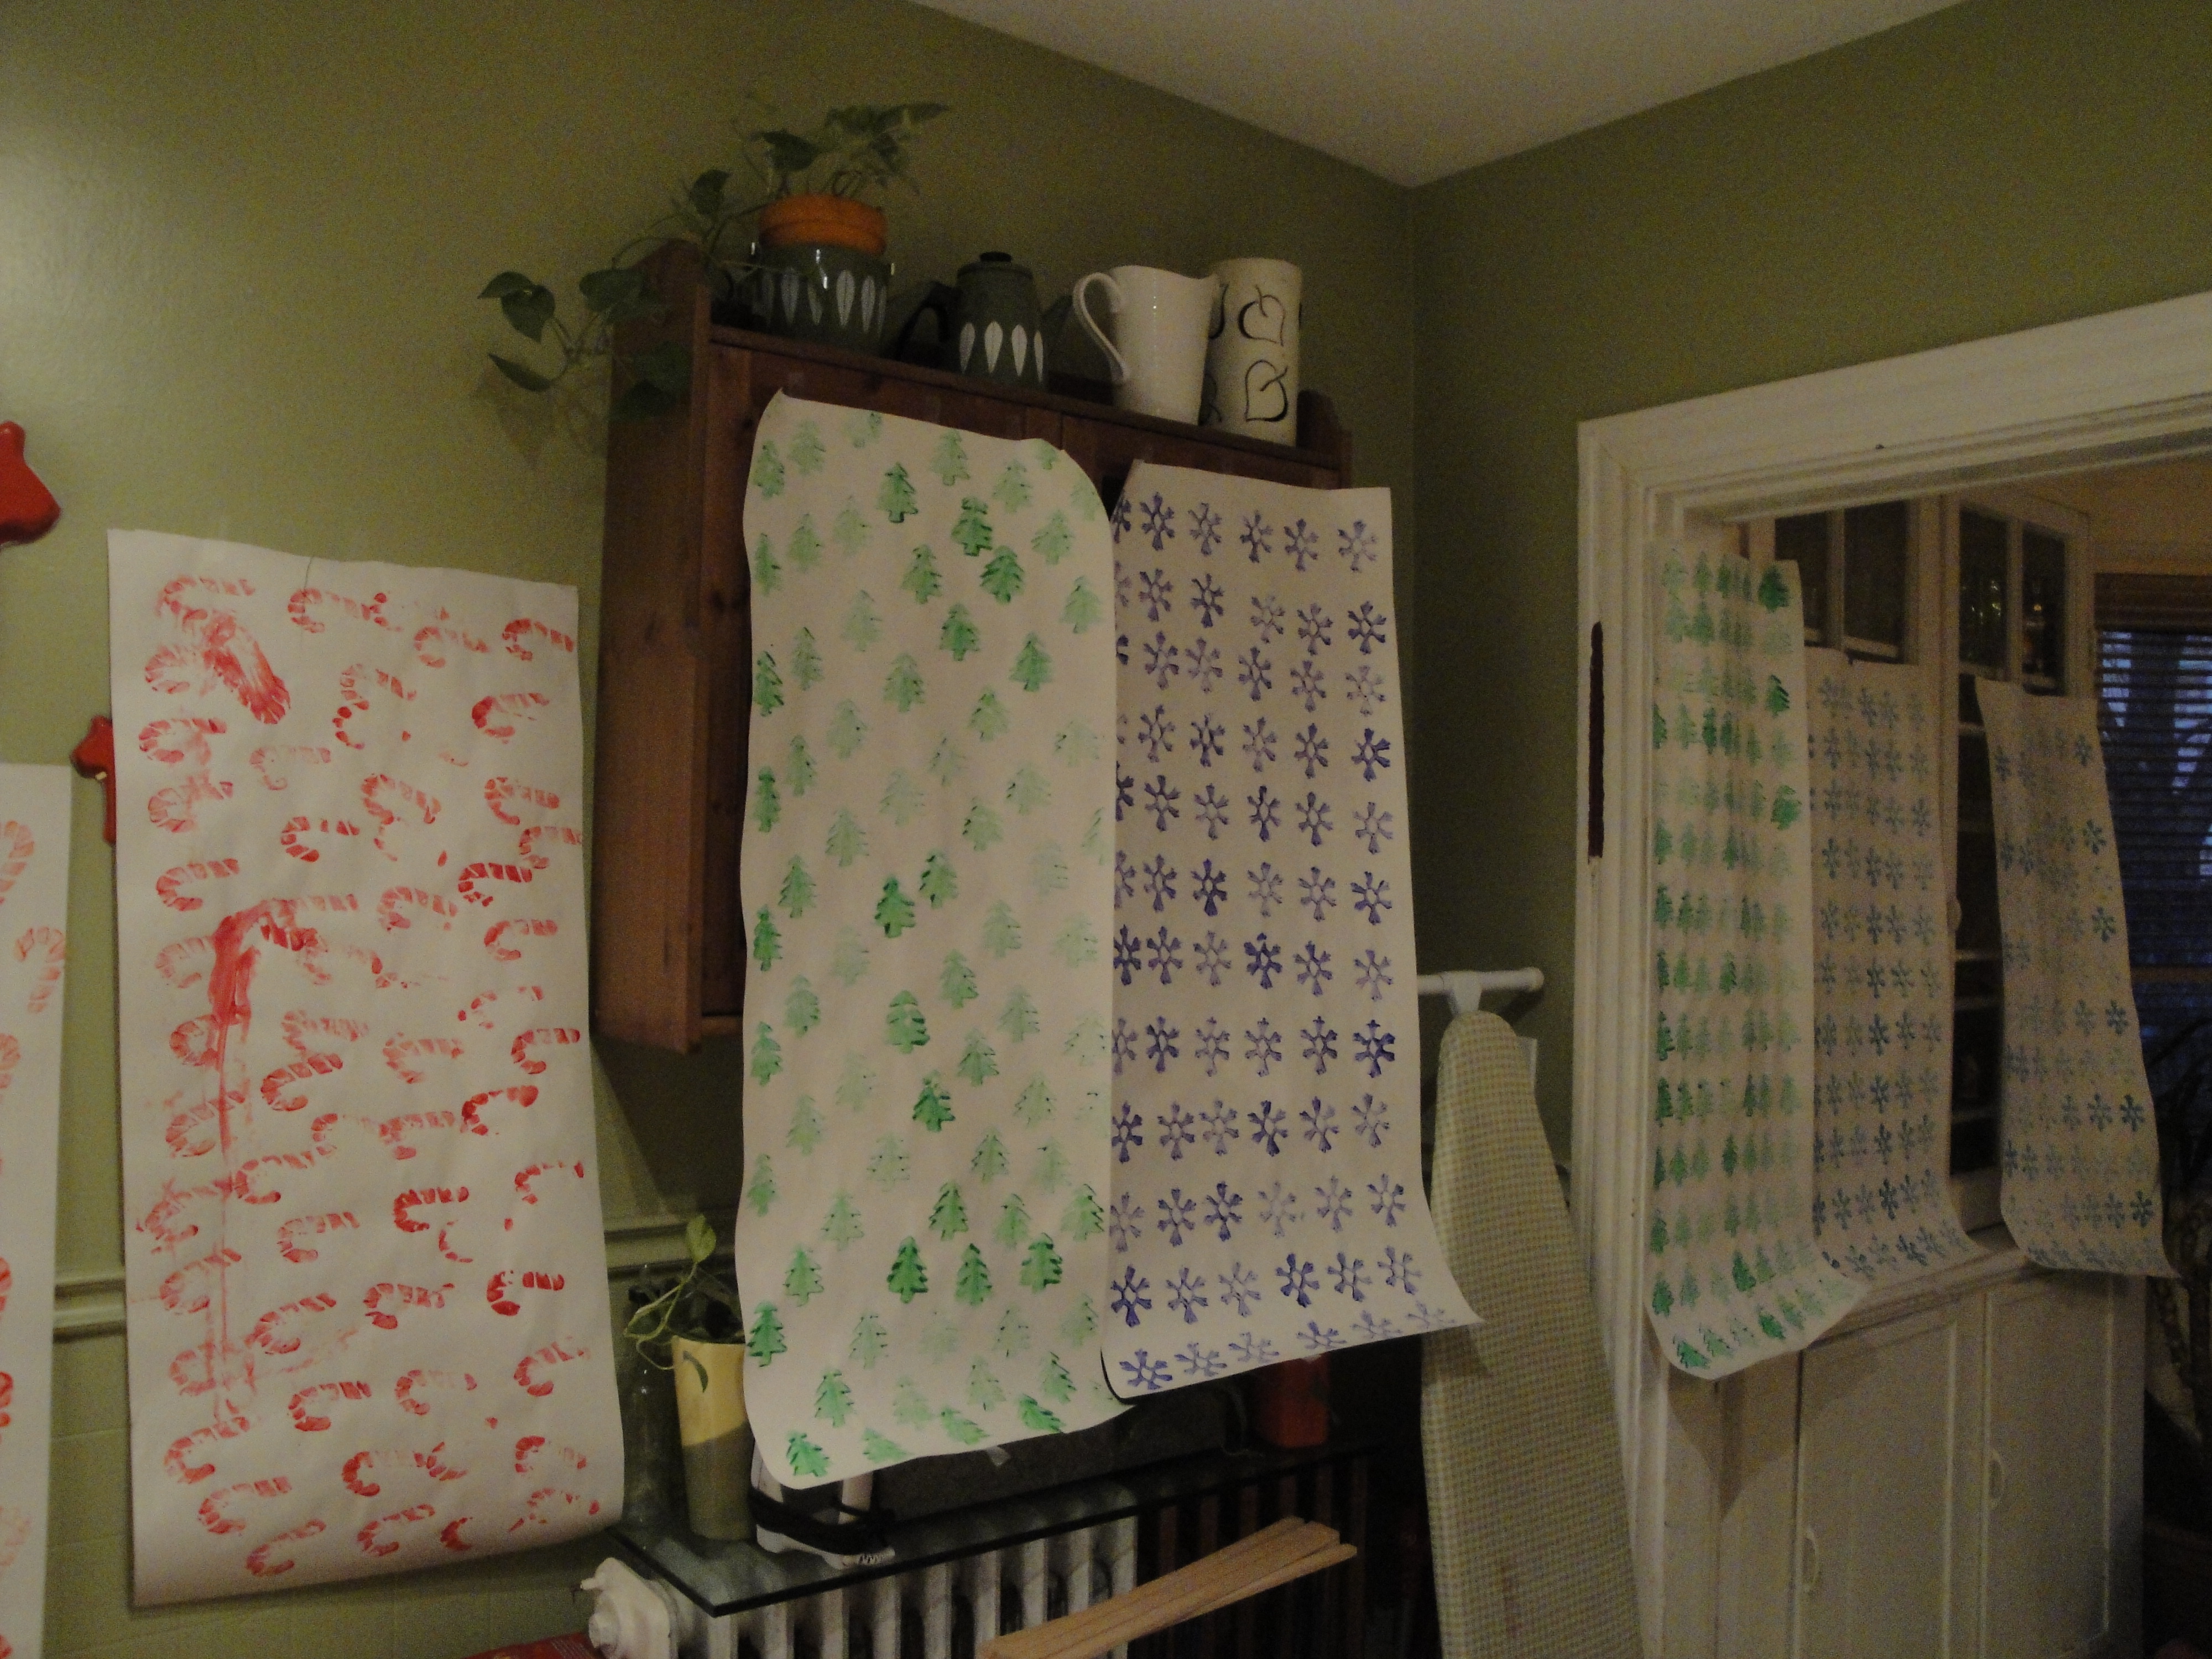
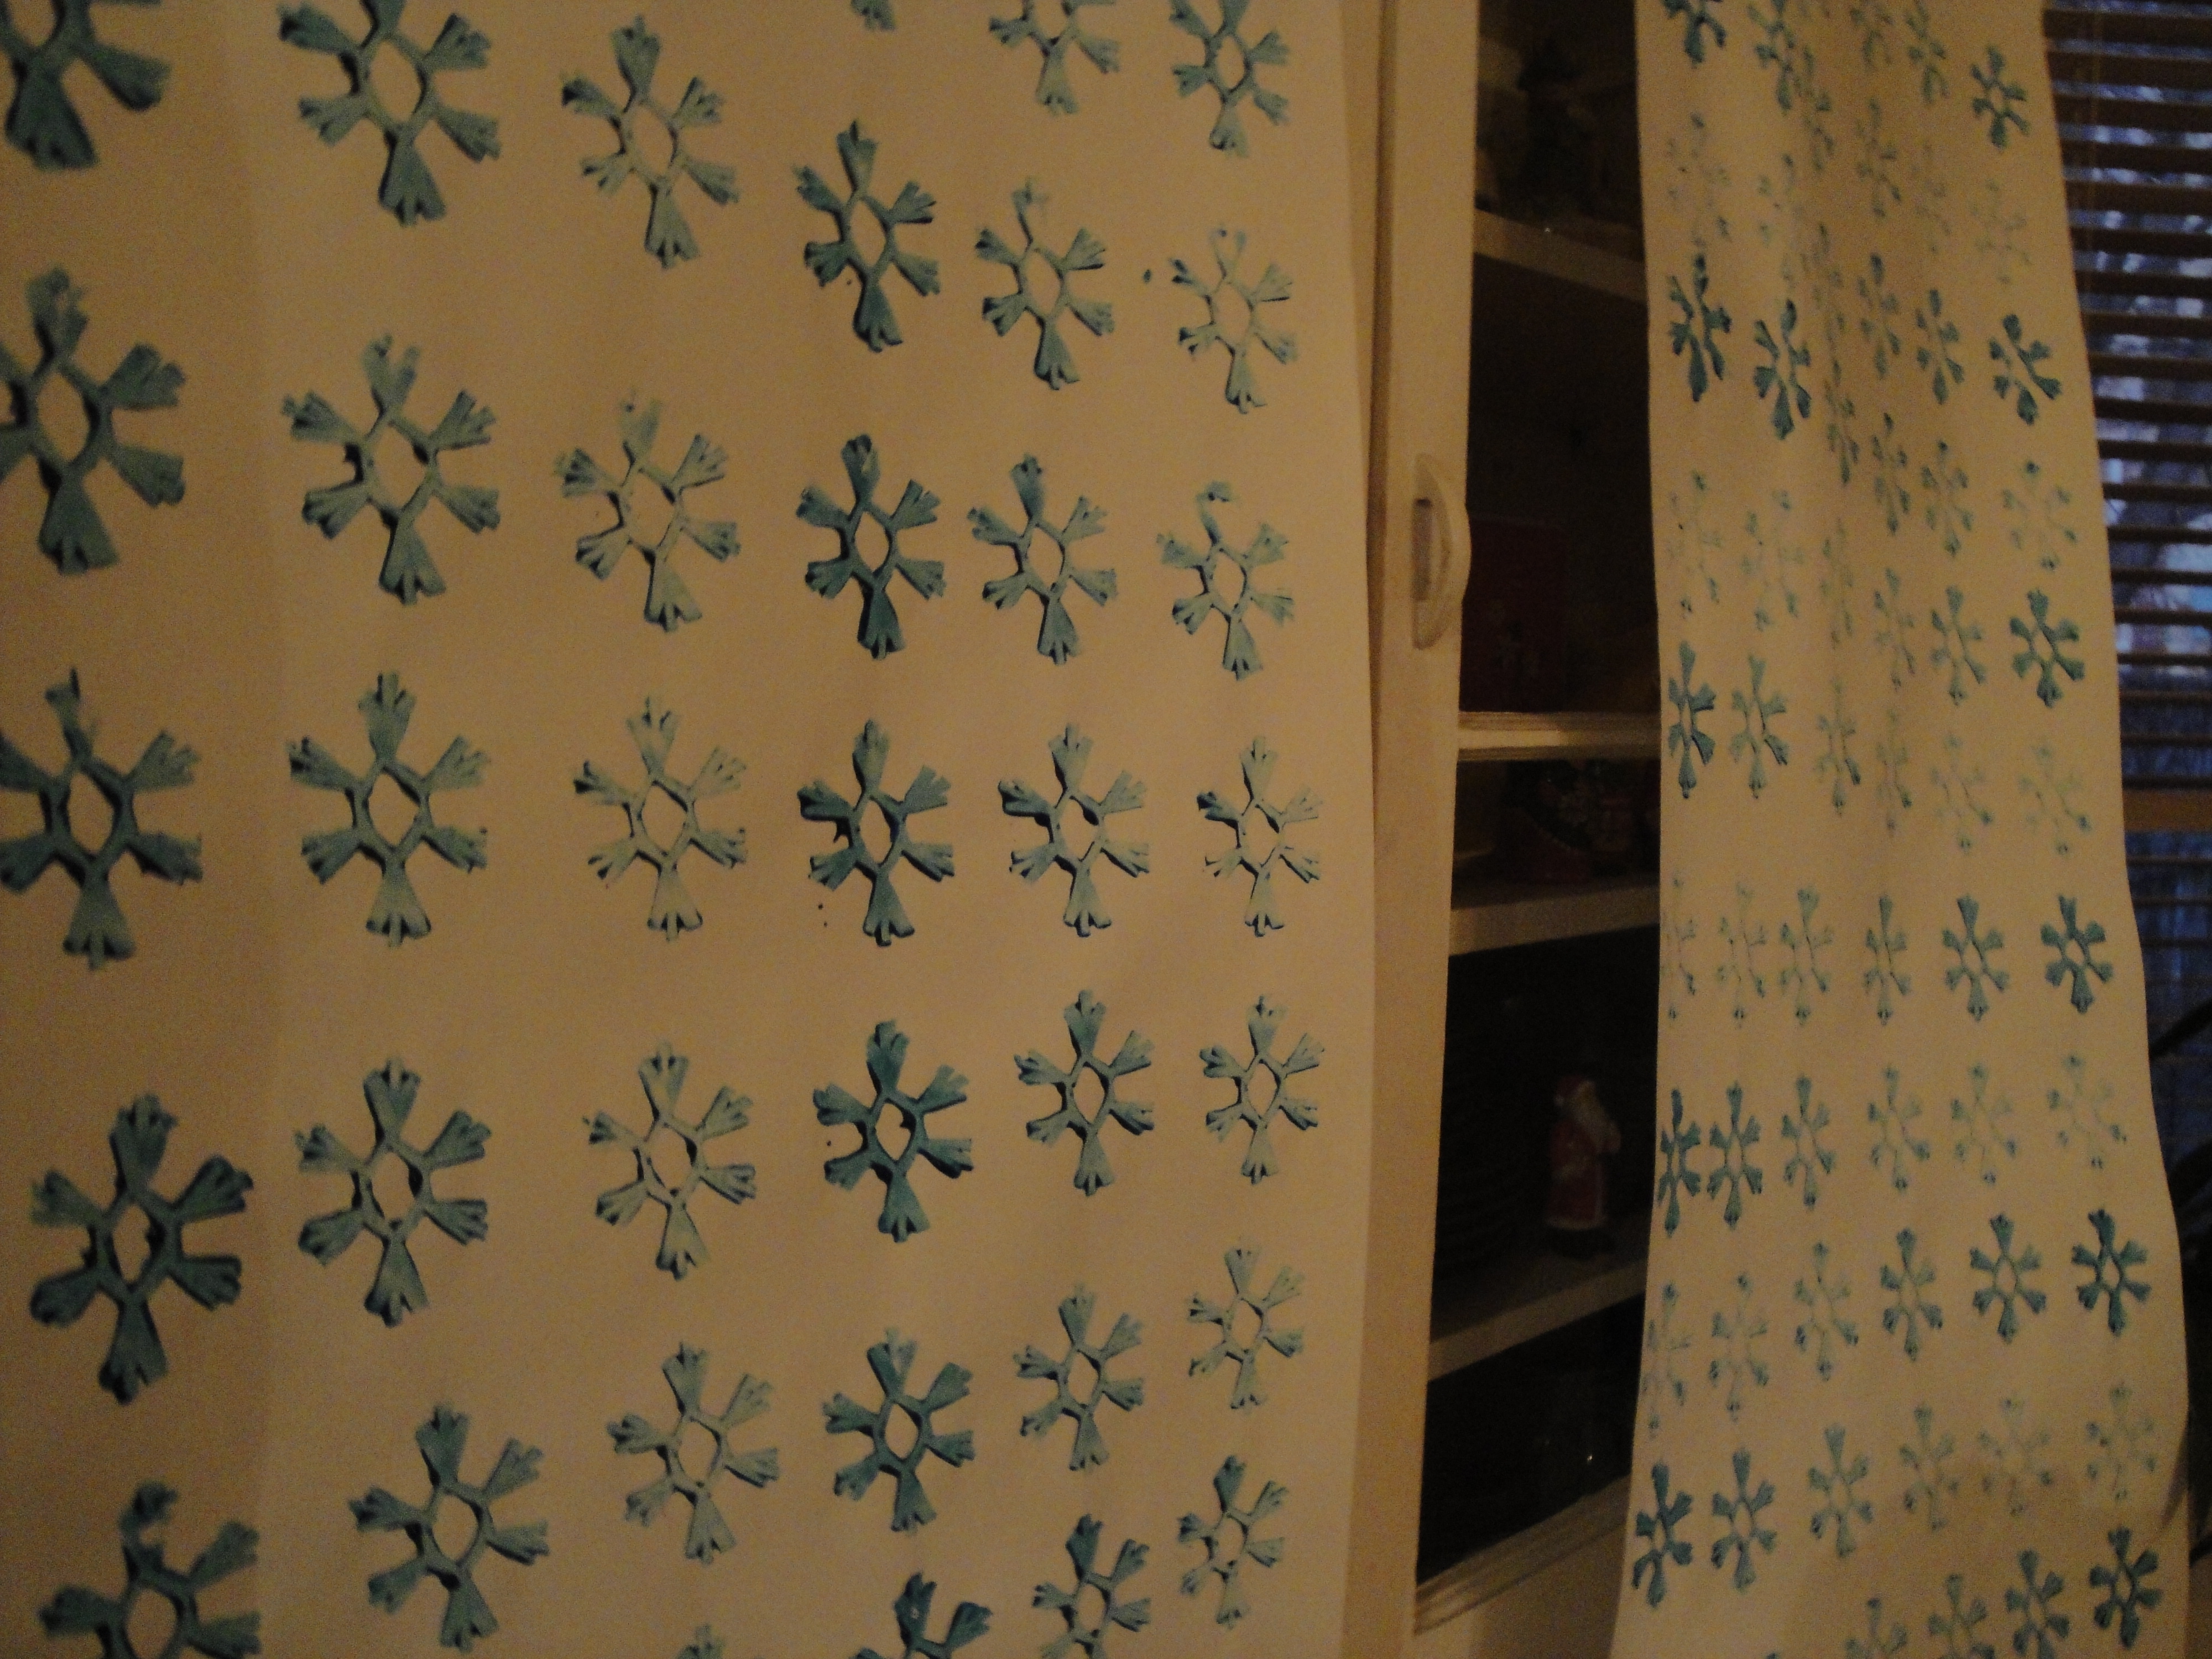
I ended up using the Mala drawing paper roll from Ikea. It’s cheap and maybe tears a bit too easily for wrapping paper, but I liked how soft the texture was, it held the paint well and dried quickly. And I used whatever tempera paint we had around, just spread it thinly on a plate and then stamped away! I ended up drying the paper by taping it to the walls. It looked beautiful, magical.
This was a great activity for a 3-year-old and also, ahem, for an adult! It felt extra special to clad our gifts in our original paper designs. And the stamps preserved pretty well for about a week. I kept them in a tupperware in the fridge with damp towels over the stamp cut-outs so they wouldn’t wither. Alas, this year it’s a mix of left-over wrapping paper from the drug store and brown paper, but I’ll dig out the fancy ribbon to jazz it up!