Category: How-to’s

Superhero Party: Plans and Invitations

This time of year is the major party period in our little family: cousin’s birthday, easter, Rudi’s birthday, hubby’s birthday. It’s about to roll out whether I’m ready or not! So I’m prepping, mind whirring, already behind on the crafting schedule!

CapeInvites_detail

The biggest excitement brewing is for Mr. Rudi’s 5th birthday. He wants superheros, which I obviously know all about (I do not). I wanted to go non-specific hero, he knows Spiderman and kind of has an idea of Batman and a few others, but I think we’ll keep it general and imaginative. Thus I am working on capes for everyone with their initial on them and we’ll have cape decorating, jumping pardon me, flying contests, speed trials, etc, basically run them ragged!

We’re even planning to set up a flying photo booth where the kids “fly” on a stool. Super RudiI’ll then photoshop the stool out so it looks like they’re flying against Rudi’s newly painted bedroom walls, featuring hills and sky! My photoshop skills are pretty minimal, perhaps even ghetto, but I can (kind of) rock the clone tool! Here’s my rough/feeble test run. But it’s for 5-year-olds, they’ll totally love it, right?!

Of course though, the first step is invitations and I cannot not make a craft project of those. I am incapable. It gives me too much pleasure. Here’s what I came up with:

I downloaded a couple of free comic book fonts for the text, which gave it a good superhero feel!
I downloaded a couple of free comic book fonts which gave the text a superhero feel!
To make it feel even more comic-bookish, I drew a simple map for the location, took a photo of it in Instagram and popped the image into the design.
I got to this point and felt the capes were too plain. To add a little quick detail I printed red Rs on circular labels (see next photo). Et voila, instant birthday-boy cape!
The capes are felt, I drew a little pattern on paper that was the right size. Then they're just stitched over top of the party details text.
The capes are felt. I drew a little pattern on paper that was the right size. Then they’re just stitched over top of the “party details” text.
Because I made the invites longitude-wise, when it came to enveloping time, I was momentarily stumped. But then I realized I could just cut 12"x9" envelopes from top to bottom, tape them with decorative washi tape. Boom, custom envelopes!
I made the invites longitude-wise and when it came to enveloping time I was momentarily stumped. But then I realized I could just cut 12″ x 9″ envelopes from top to bottom, tape them with decorative washi tape and boom, custom envelopes!
All washi-taped and ready for mailing or hand delivery. Invitations sorted, now for the capes ...
All washi-taped and ready for mailing or hand delivery. Invitations sorted.

Paint Sample Valentine Bunting

IMG_0050

Happy Valentine’s Day! Yes, the big V day is here and I do so love to embrace the day of love, not so much in the couple-y sense, but in the wider, appreciating the people and things around me sort of a way.

And it inspires all sorts of craftiness in people far and wide, which is so excellent!

I, along with the rest of the crafty world, have fallen for buntings in the past couple of years and envisioned this one just last week while standing in front of the paint samples at Rona. Didn’t know if I’d have time to make it happen but I squeezed it in, threading hearts in the driveway while my sons pretended to drive in my stationary car (side note/free parenting tip: this is an excellent way to buy some time, just let them sit in the driver’s seat and go go go til they’re spent. If the horn honks, it just spices up the neighbourhood). My husband brought in a couple of snowy, errant hearts that I’d dropped when he came home later, hazards of crafting on the go.

photo

I adore paint samples. The the graduation in colour, the heavy texture of the paper, the free-ness, the often-ridiculous commercial names of the colours. Here are some good ones from this bunting: Irish RoseGrape Vineyard (is there any other kind?!), Satin Serenade, Ballerina Slipper (waaaay off, much darker than an actual ballerina), Very Pink (in case of confusion), Grape Jamboree, Vintage Violet (exactly as you’d imagine), Strawberry CrushFrankly Scarlet (could you settle for any other red after reading that?), Valhalla (Norse gods always make me think violent fuchsia, of course they do!), Canterbury Lane, Peppermint Pink (nice contrast in terms), RedfeatherPurple Polka (I’d take that dance), Vibrato, Regal Robe (just to end on operatic notes). Names aside, I simply find paint samples satisfying to look at. Plus they are a great, free art/crafting resource. One that I take liberal advantage of.

Here’s a little howto:

1: get yourself a big stack of purple and pink paint samples

2: cut out a heart template that fits on your paint sample. Since my samples were rectangle, I made a heart that fit twice on each page

3: cut out a lot of hearts!

IMG_0036

4: hole punch 2 holes in each heart (that sounds so harsh!), one in each hump (that word alway sounds dirty to me …)

5: thread a ribbon or a piece of bias tape — I found some excess burgundy bias tape lying around that did the trick — and cut to desired length

IMG_0035

6: thread ribbon through holes in hearts starting from back-to-front so that the heart looks “stitched” across the two humps

IMG_0032

7: et voilà! Valentine bunting! And you can store it away for next year, leaving time for new love crafts …

IMG_0054

Free Pattern: Candy Corn Bunting How-To

I love Candy Corn. Not really to eat, I actually find it cloying and a bit meh, but I LOVE how it looks! I was inspired by a September post on The Purl Bee for these charming knitted candy corns. This halloween is going to pass me by before I manage to knit one, but come 2013, look out!

Anyways, it got me thinking how candy corn is a great decoration. And I also love me a good bunting (aka garland or pennant strand). And I thought: candy corn bunting! I googled to see what was out there — and there are lots, but none that I really loved. So I made my own. And I decided to share it with you! You can click HERE for the free pattern. I am no photoshop wizard, I aspire, but I cobbled this together and hope it inspires all sorts of candy corn bunting glory!

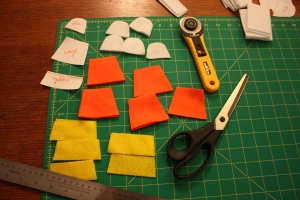
1. I grabbed some craft felt ends I had lying around and cut my candy corn pieces. In this case I’d decided I’d go with seven pieces on the strand, so I needed seven pieces of each colour.

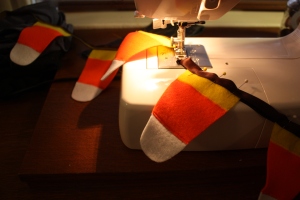
2. a. Using a wide, tight zig-zag stitch, I attached the candy corn pieces together. I kept the pieces flush and the seam line right in the middle so that the zig-zag grabbed both sides of the felt.

2. b. I used orange thread between the white and orange pieces and yellow thread between the orange and yellow pieces.

3. Next I measured out a piece of 1″ wide brown ribbon (bias tape works well too) to length. Because the felt candy corns are 3″ wide at their widest point and I wanted 2″ in-between each corn, I calculated 5″ for each corn, plus an extra 15″ on each end to allow for securing the finished bunting. So with my seven-piece candy corn bunting, I cut a length of approximately 65″.

4. Next, I pinned my finished candy corns onto the ribbon, about 2” apart. In this case I pinned them halfway up the 1″ ribbon and folded the ribbon over the felt so the finished ribbon is 1/2″ wide. Then I sewed ’em down with a zig-zag stitch.

5. Lastly, I made some loops on the end of the ribbons so that the bunting can hang from hooks or tacks. I also left the ends long enough that they can tie. I used yellow thread on the brown ribbon. Kind of Charlie Brown-ish, love it.

Download the CANDY CORN BUNTING PATTERN right here for free! If you make one, send me a picture, I’d love to see how it evolves.

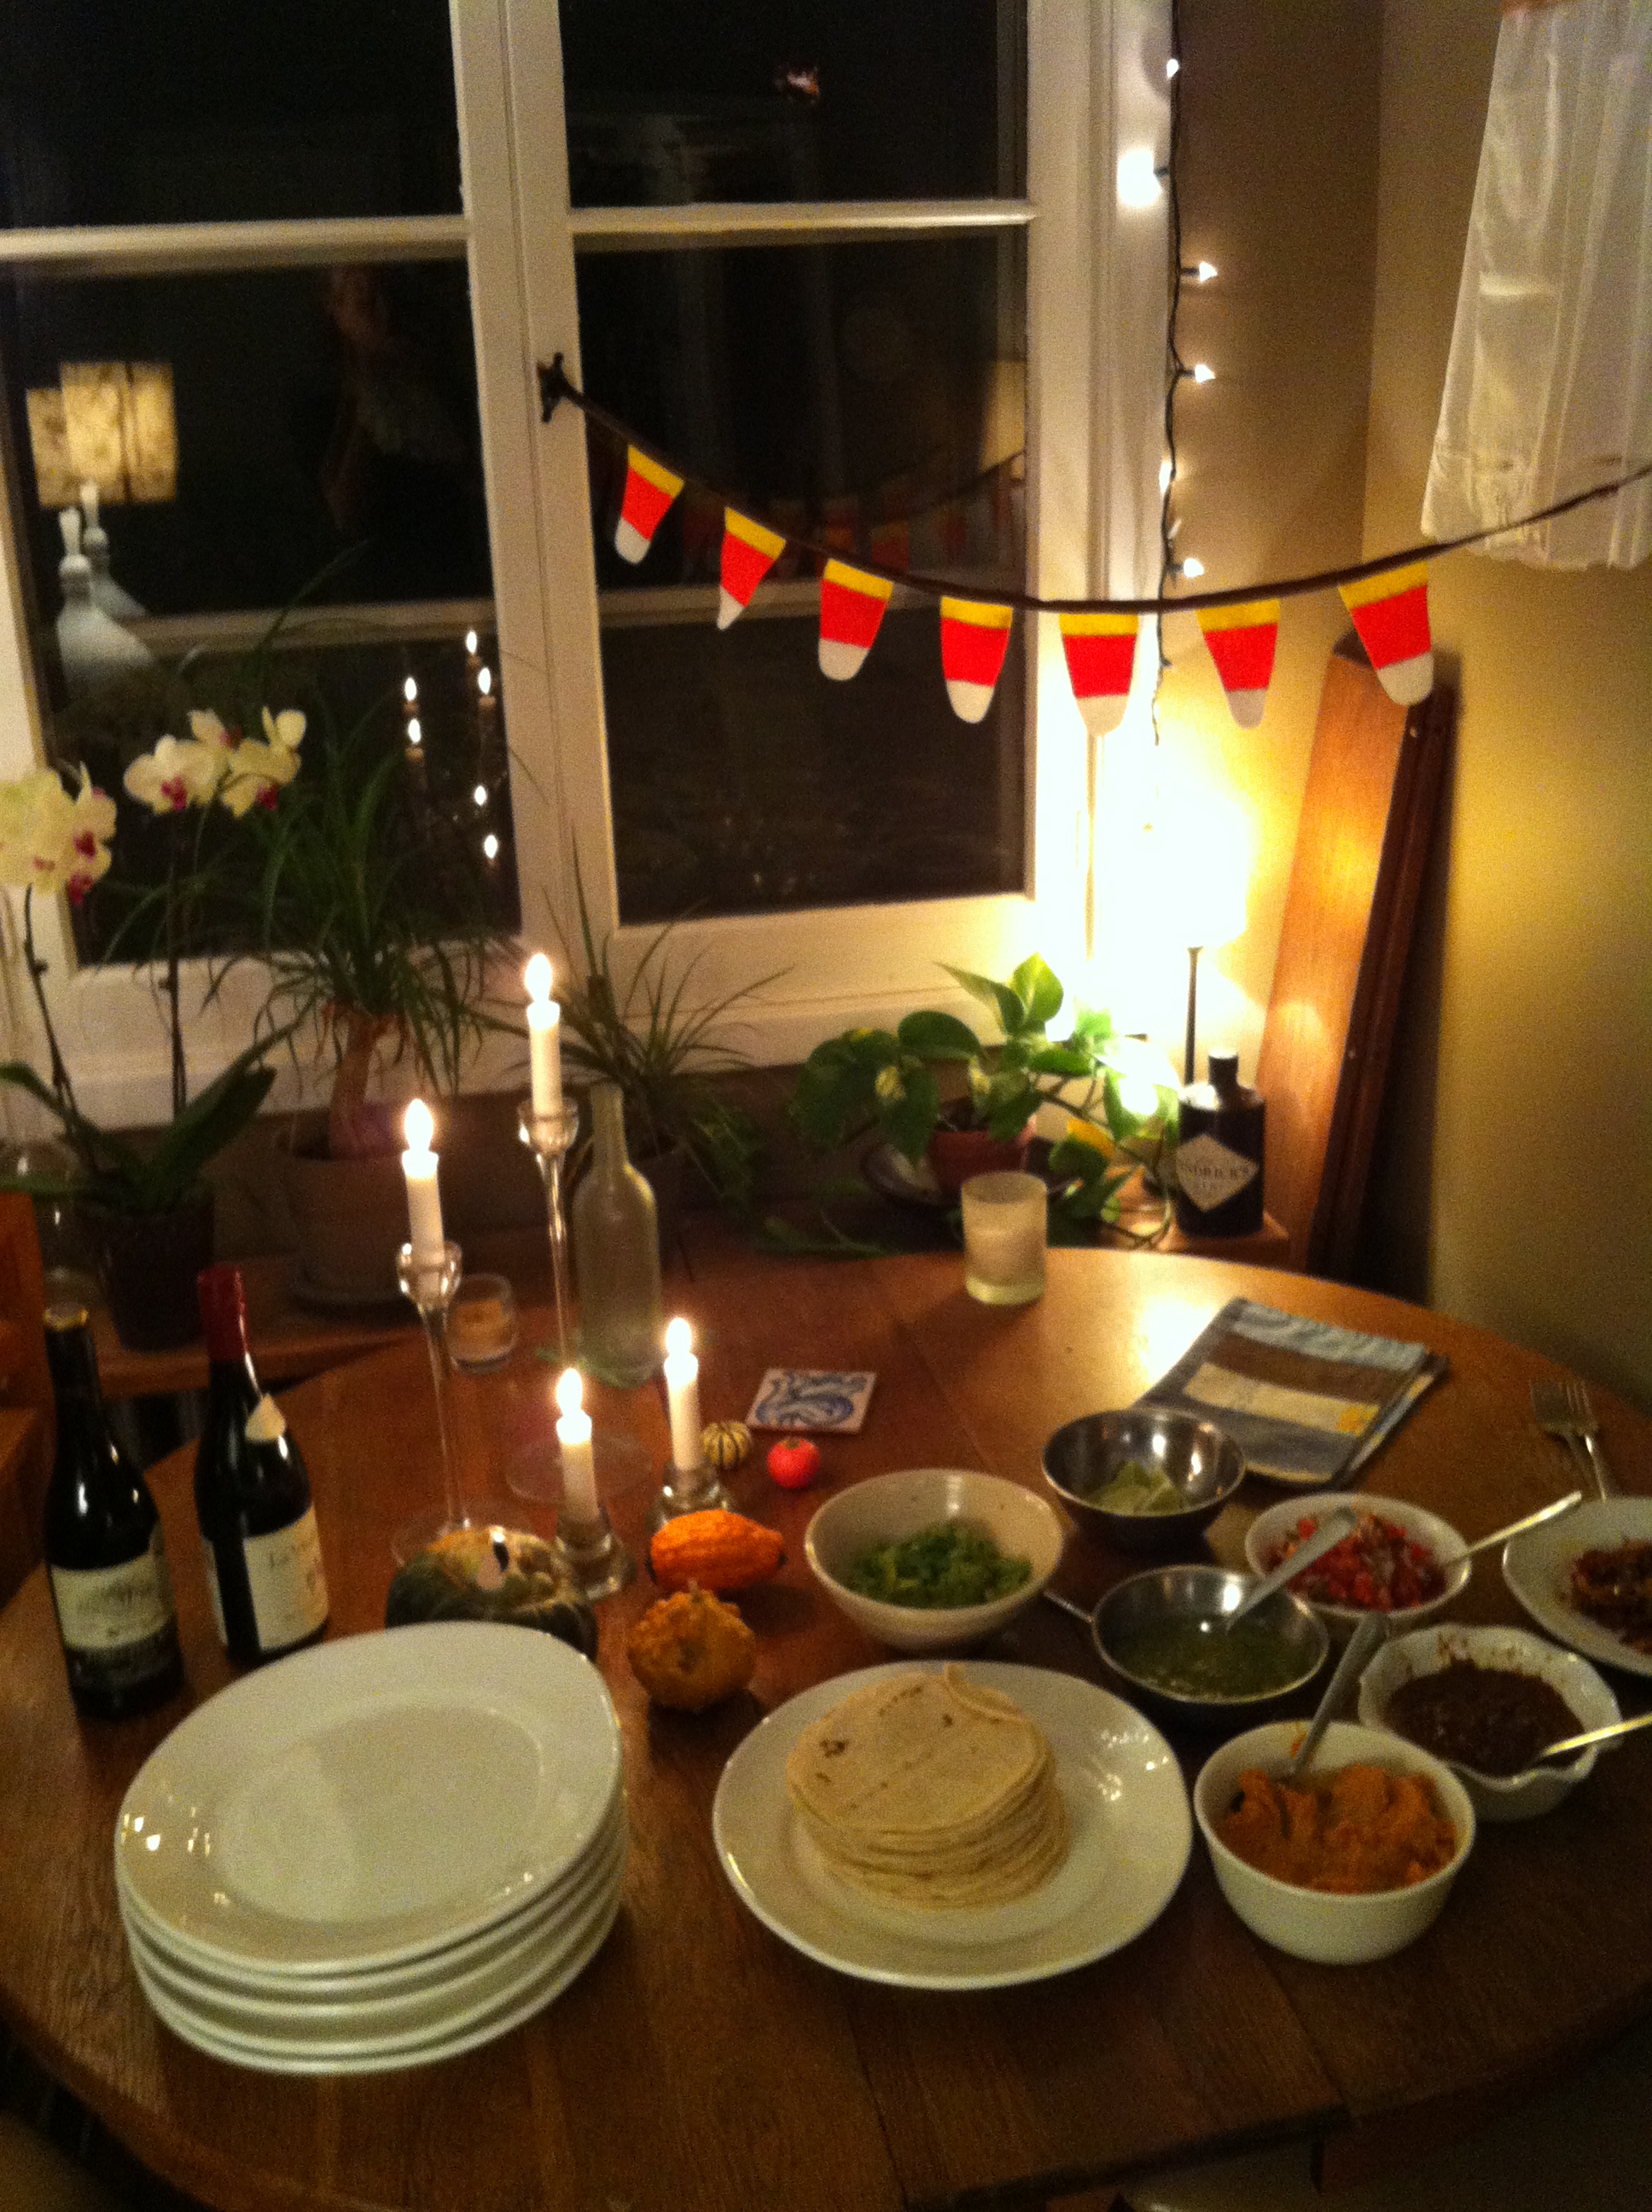
This little candy corn bunting was bound for a dinner party at a dear friend’s house. Here it is in it’s little glory, sitting above a delectable fall feast! Happy candy corn season folks.

CANDY CORN BUNTING PATTERN – a free download!

Rearview Fridays: Alice in Wonderland Mobile

I was putting Rudi to bed the other night and looking up at his Alice in Wonderland mobile, as I do whenever I lie beside his little quieting self at bedtime. I love it so much (both the lying beside a sleepy little boy part and the mobile!) and realized  that the mobile should have a turn in the Rearview Fridays seat! I am pleased to introduce Alice and her cohort who watch steadfastly over Rudi from high up in the air …

I found the vintage Alice in Wonderland fabric remnant at Lazy Susan’s in Vancouver (a super charming shop, now just in Victoria and online) years before I had kids and tucked it away with the idea that if/when babies came I’d make something from it for them. And I did! In fact I think it was the first thing I made while I was pregnant with the now 4-year-old Rudi.

I was inspired by the simple mobile design I saw in embroidery artist Emily Hamill‘s studio shop and used that as a starting point. I used wooden dowel for the frame and sewed triangular corners onto a square of fabric to tuck them into and presto, strong frame! I cut out the charming characters and weighted each corner with one, choosing a simple white for the background to calm the busy of the art side. A couple of Alices, Humpty Dumpty, and the White Rabbit balancing the Mad Hatter.

I think when Rudi is too big for an arty, retro mobile in his room, I’ll hang this one in my workroom. I never get tired of Sir John Tenniel’s classic illustrations twirling lazily past.

The Final Felting

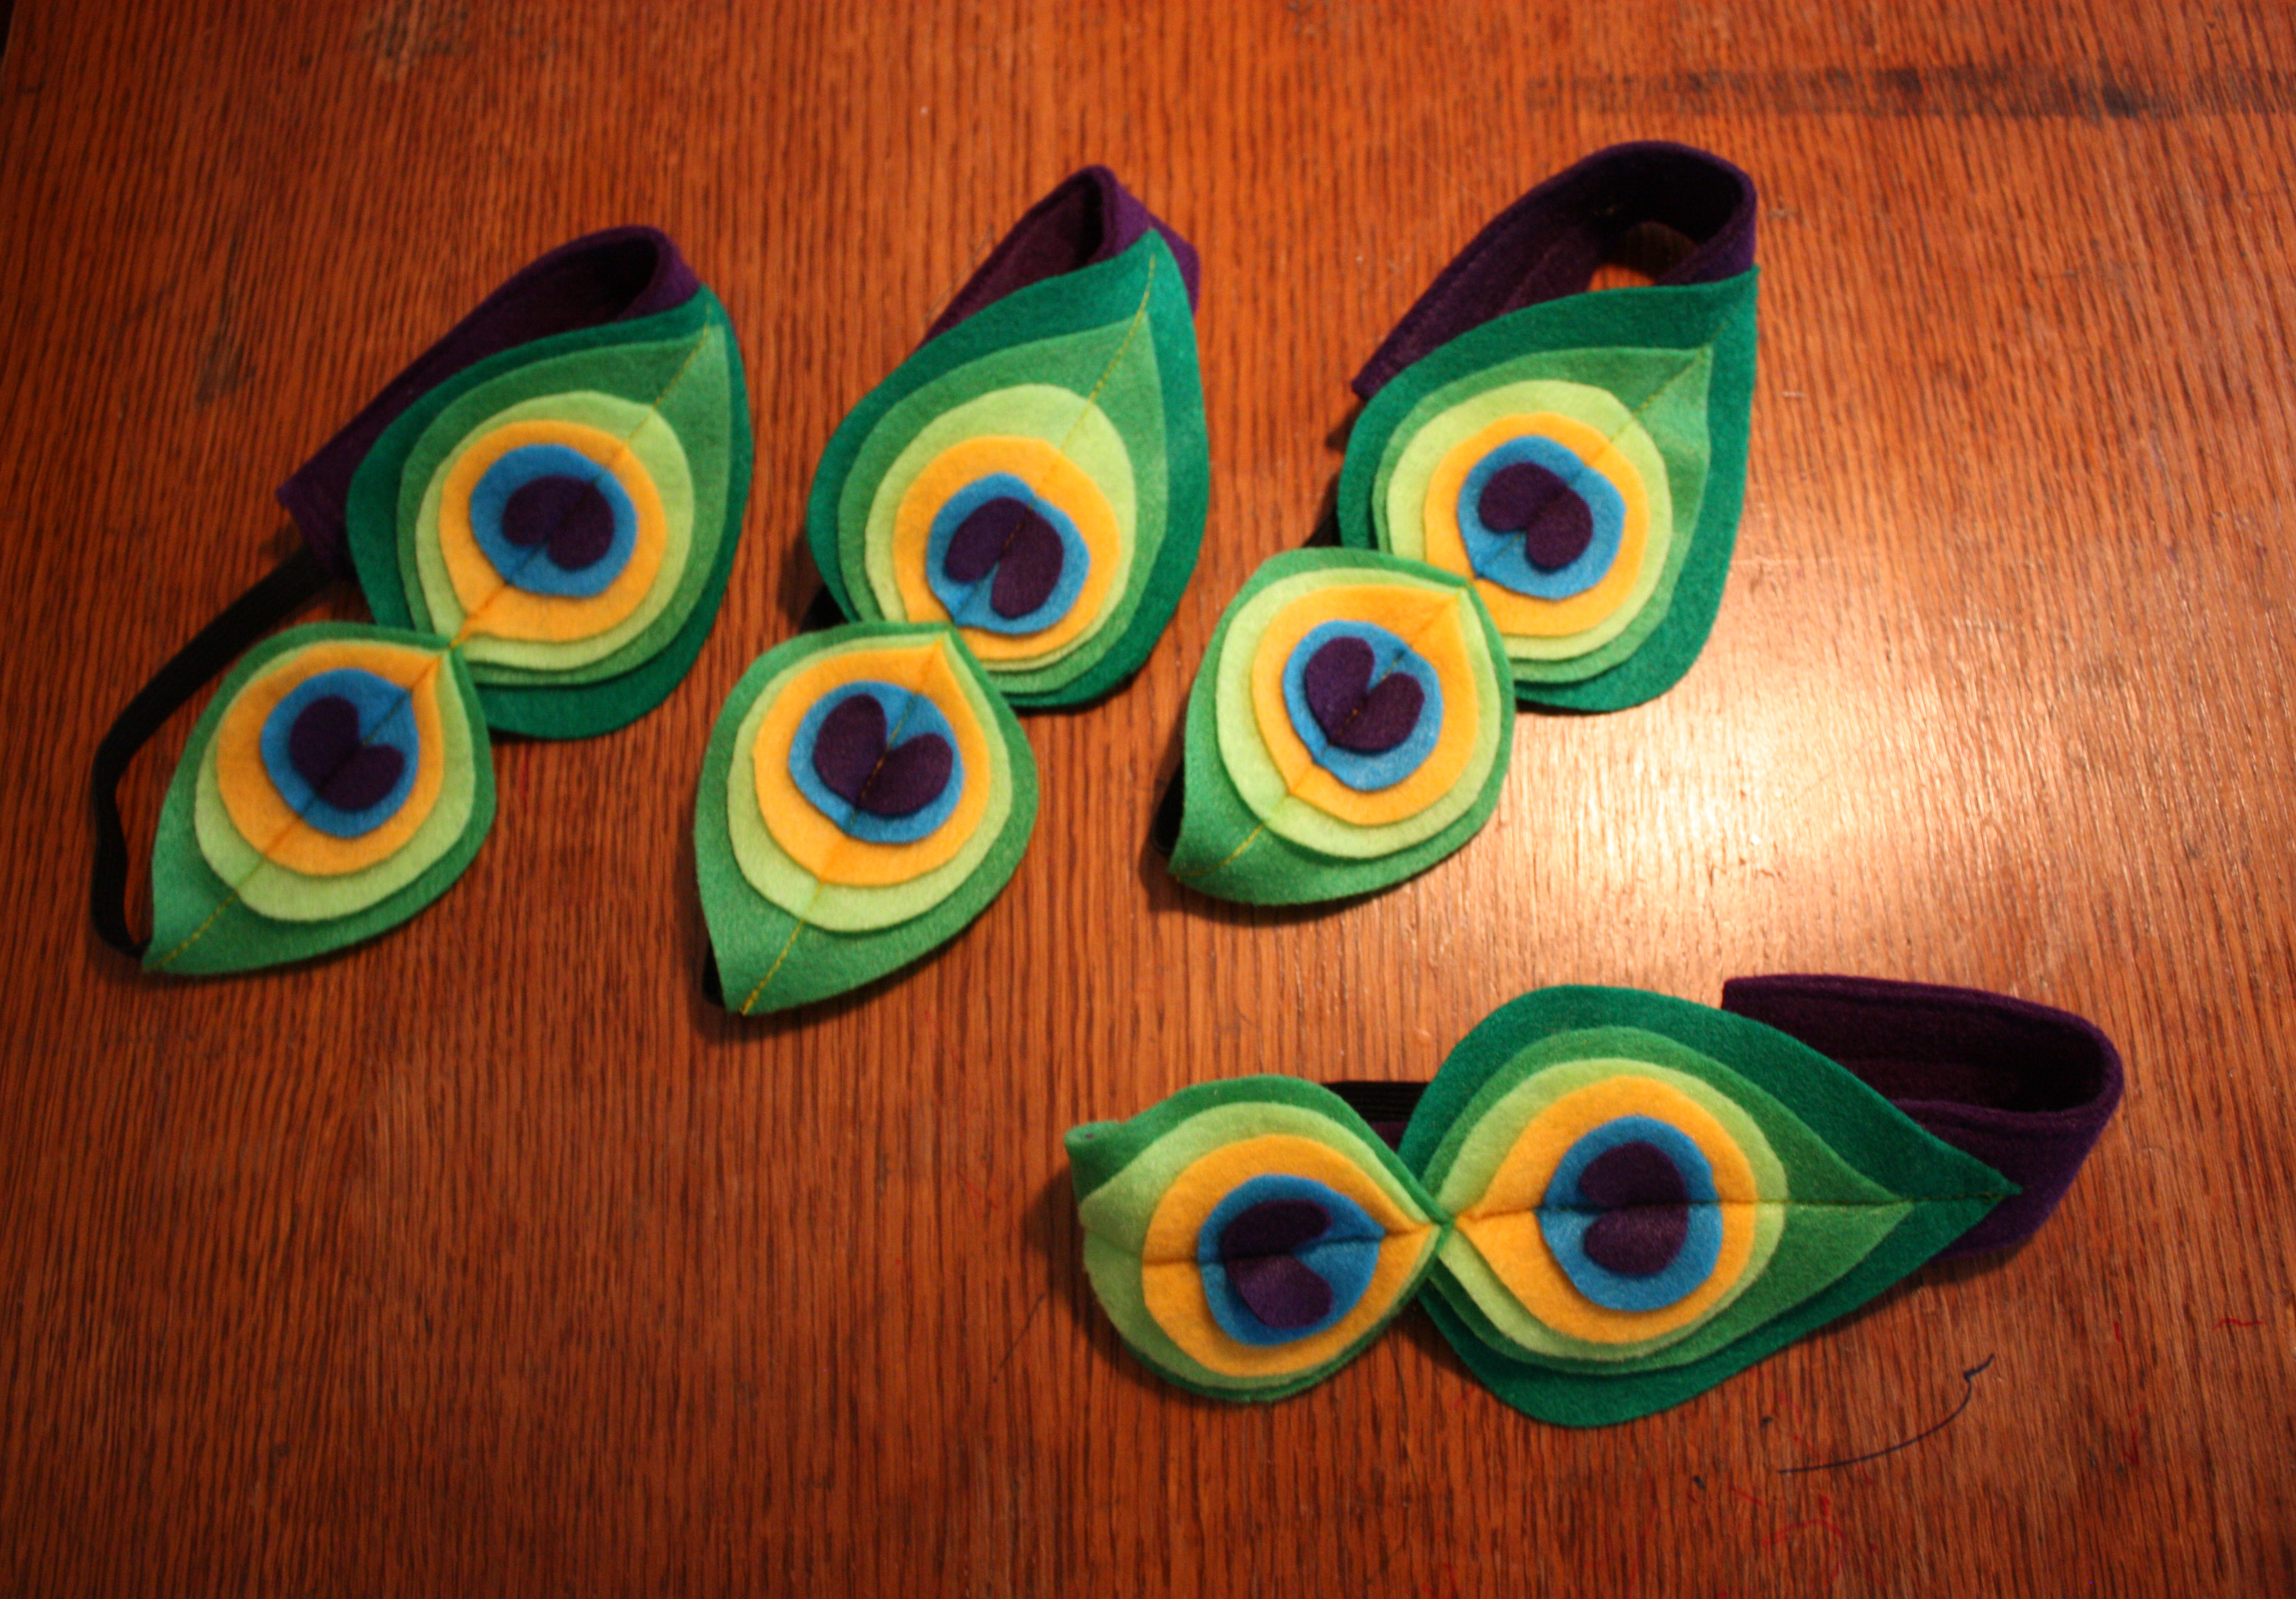
I’ve been working on a fun and inspiring costuming gig for the past few weeks. You can check out earlier parts of the project here and here. Above are the super charming Peacock Clips that will clip on the front of emerald bodysuit/tutu combos. They’ll be accompanied by the headbands below:

I am in love with the Peacock pieces. Who doesn’t love the rich and unexpected colour combos in a Peacock feather — and it works so well in felt.

Next, Goldfish! They are brooches that will sit at the turquoise hips of each wee dancer. And note the awesome cutting mat and Olfa rotary, dang I’m loving them!

Followed by little tuxedo-inspired bibs that go with top hats and gloves for a tap dance number. I wasn’t sure I liked my idea on this one and then in reality, it’s a contender for favourite, I think it’s totally charming! Could be great in cotton as a baby bib, hmmmm …

Here’s a work in progress shot of the pieces for the elegant grey and cream flowers for the Flower Waltz dance. They will sit against plum coloured suits:

And the finished products. My first “S-fold” flowers were very satisfying to make. I appreciated the fickle pickle’s tutorial. I ended up hand stitching my flowers rather than gluing them and used felt circles rather than buttons in the middle, but she unravelled the mystery for me and got me rolling — and that’s why I love crafty bloggers. Three cheers for sharing!

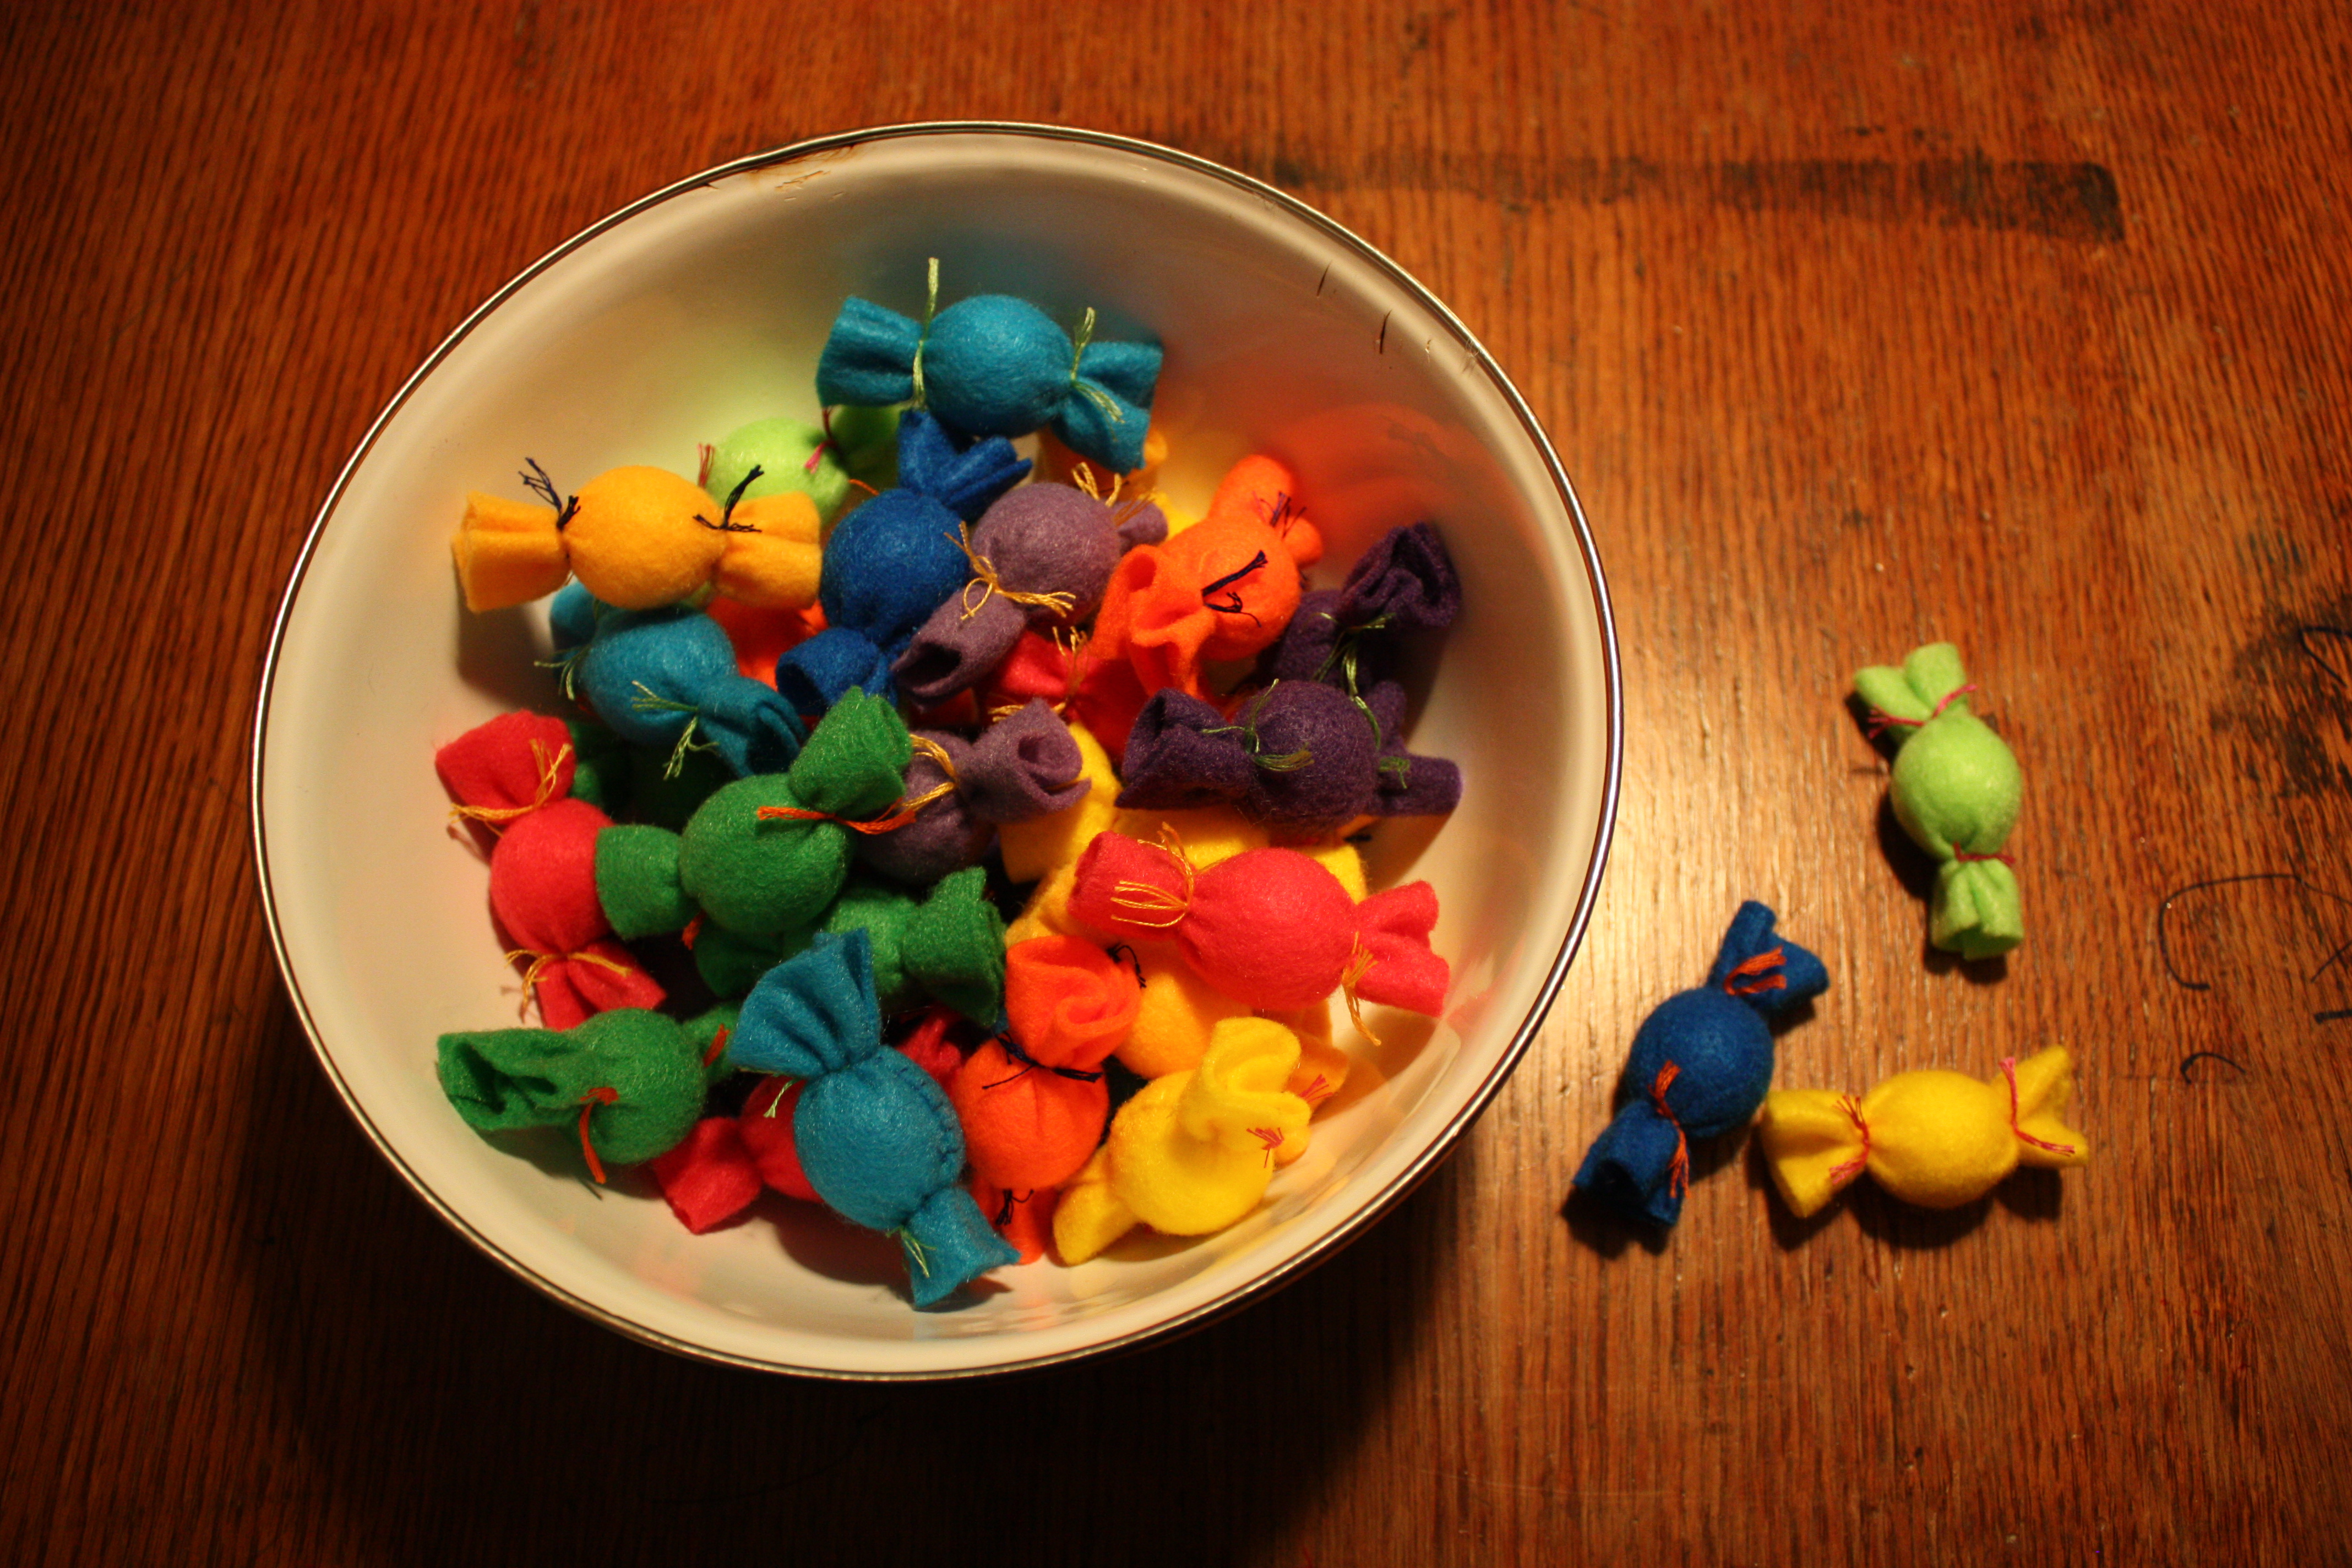
And lastly, most sweetly, I leave you with a bowl of candy. Felt candies. But don’t them look delectable? I caught Rudi licking them, riiiiiight. They ended up being strung along ribbons and hung shoulder to shoulder and shoulder to hip on little dancers in royal blue. And then one pink and one blue candy each on barrettes in their hair. My teeth are aching from the sweetness.

Thanks to Kitty Ballistic for the joyful, colourful idea and for the tutorial. I see more of these in my decorating future …

Cars party doodads

We made it through the friend-birthday-party with flying colours, though now I am ex-haus-ted! Rudi asked for “a Cars 2 party” and planned it together. I adore making his birthday parties personal, having a hand in loot bags and/or cake. It’s really rewarding to pour myself into something just for him, even if the cake is gone in the blink of an eye! And the crafting and baking makes the experience more tangible and exciting for him, and for me.

I think I’ve said here before that I am not really a baker, but I try now and again. And I love watching the magical baking shows where they make amazing cakes that defy the apparent laws of gravity that my cakes adhere to. So I thought I’d challenge myself and try fondant, and it wasn’t so bad! I kept the cake simple, flat, and used sugar decorations that Rudi chose/adored — who knew they still made these?! They remind me of 1980s birthday cakes. Here’s the result:

The cacti marzipan dyed with gel dye that my friend lent me — another baking revelation — and I even made my own glorious buttercream to dirty-ice the cake under the black fondant. To really go for the win, I decided to try making the inside a checkerboard flag. This was the best part for Rudi as he helped me slice thin slabs of the chocolate and white cake and place them alternately on the cake board. It worked! We were so excited! Susan Kendal, FTW!!! Check it:

And then Skor bits for dirt of course. Does it get any better? The kids blasted through our Cars cake in record time, leaving huge blobs of black fondant all over the table. Another birthday cake, sorted.

As I mentioned in a recent Rearview Fridays post about some past birthday craftinesses, above all I adore making loot bags. Or in the case of this Cars 2 party, loot CANS! If you haven’t seen Cars 2 then you might not know about Allinol, a fictional fuel that is key to the plot. I thought it’d be funny to make little oil cans for the loot bag/cans, so we started with the purchase of an obscene amount of apple juice and a no-water-apple-juice-only week in the household (it’s in the name of awesomeness kids, chug, chug, chug).

After emptying the cans and soaking off the labels, I pulled a jpeg of the Allinol logo off the web and printed it out on label paper, et voila:

And of course we needed labels so that the cans could be claimed by the 4-year-old guests. Those had to be traffic cones, naturally! I made a wee template and cut ’em out of bright orange felt with a paper one for the name:

I just love how the finished Loot Can came out. And aside from the forced apple juice drinking, it was pretty easy, and makes a great marker/scissor/etc holder!

A rewarding party it was. As I lay on the couch in the post-party haze, drinking an Allinol can of wine a glass of wine, Adam (the patient, amused, house cleaning husband in the midst of all this madness) asked me what next year’s party was going to be. I snorted and told him I needed a bit o’ time before I start thinking about the next extravaganza. Then he joked/seriously suggested that a 5-Alive party would be great for a 5-year-old, good colour scheme, automatic juice element … and the wheels started to turn …

Sharpie tie dye & quilt progress

Anutie Maria, my lovely sis, came over today and brought Beyblades as a birthday gift for Rudi. I only know about these toys because I have a 7-year-old nephew. If you don’t know and you want to know, check ’em out. I have learned that they are insanely popular among the cool kids these days and Rudi is beside himself to now be counted among the owners of these battling tops.

We decided to try a Martha Stewart craft with Auntie M and in honour of spinning tops and battling Beys, we used spiral designs of course! Who knew you could tie-dye with Sharpies?! And I do love Sharpies, so much so that I have a huge multi-colour set. You just draw with Sharpie and then drop Isopropyl alcohol on it and heat-set the colour. For the full instructions go check out Martha and her minions.

They came out beautifully and are far more hip than I anticipated. I love the intense colours! It was a great craft to do with a 4-year-old, he was able to draw on the shirts with ease and worked the dropper like a charm. At about 15 minutes total, it was good for a shortish attention span. Then Rudi was back to lettin’ ‘er rip. That’s right, that was a Beyblade reference. Boom, dropped it in just like that.

For myself, I went back to a project I’d set aside a while ago but which calls to me every day, ‘fiiiiinnish me, I’m so looooovely, you waaaaaant to” and so on. It’s a quilt I’m developing for my Etsy shop. Here it is with it’s seams showing!

I’m still building up product stores and not ready for the opening part of the Etsy shop, but I’m getting closer and getting excited to wade in. This lovely piece should be done by the end of the week, along with it’s matching burp pad.

Adventures in …

… BABY FOOD!

My little Gene-bean is now 6 1/2 months old. He’s been gnawing on veggies, toast crusts, fruit, hunks of meat, generally taste-testing anything we’re eating for the past few weeks. With his big brother Rudi, I did the widely perscribed and accepted intro to eating through a series of different cereal, but I found it oh so bland, boring, messy and altogther uninspired. So with Gene, we’re trying something different — he’s eating what we’re eating (within reason!).

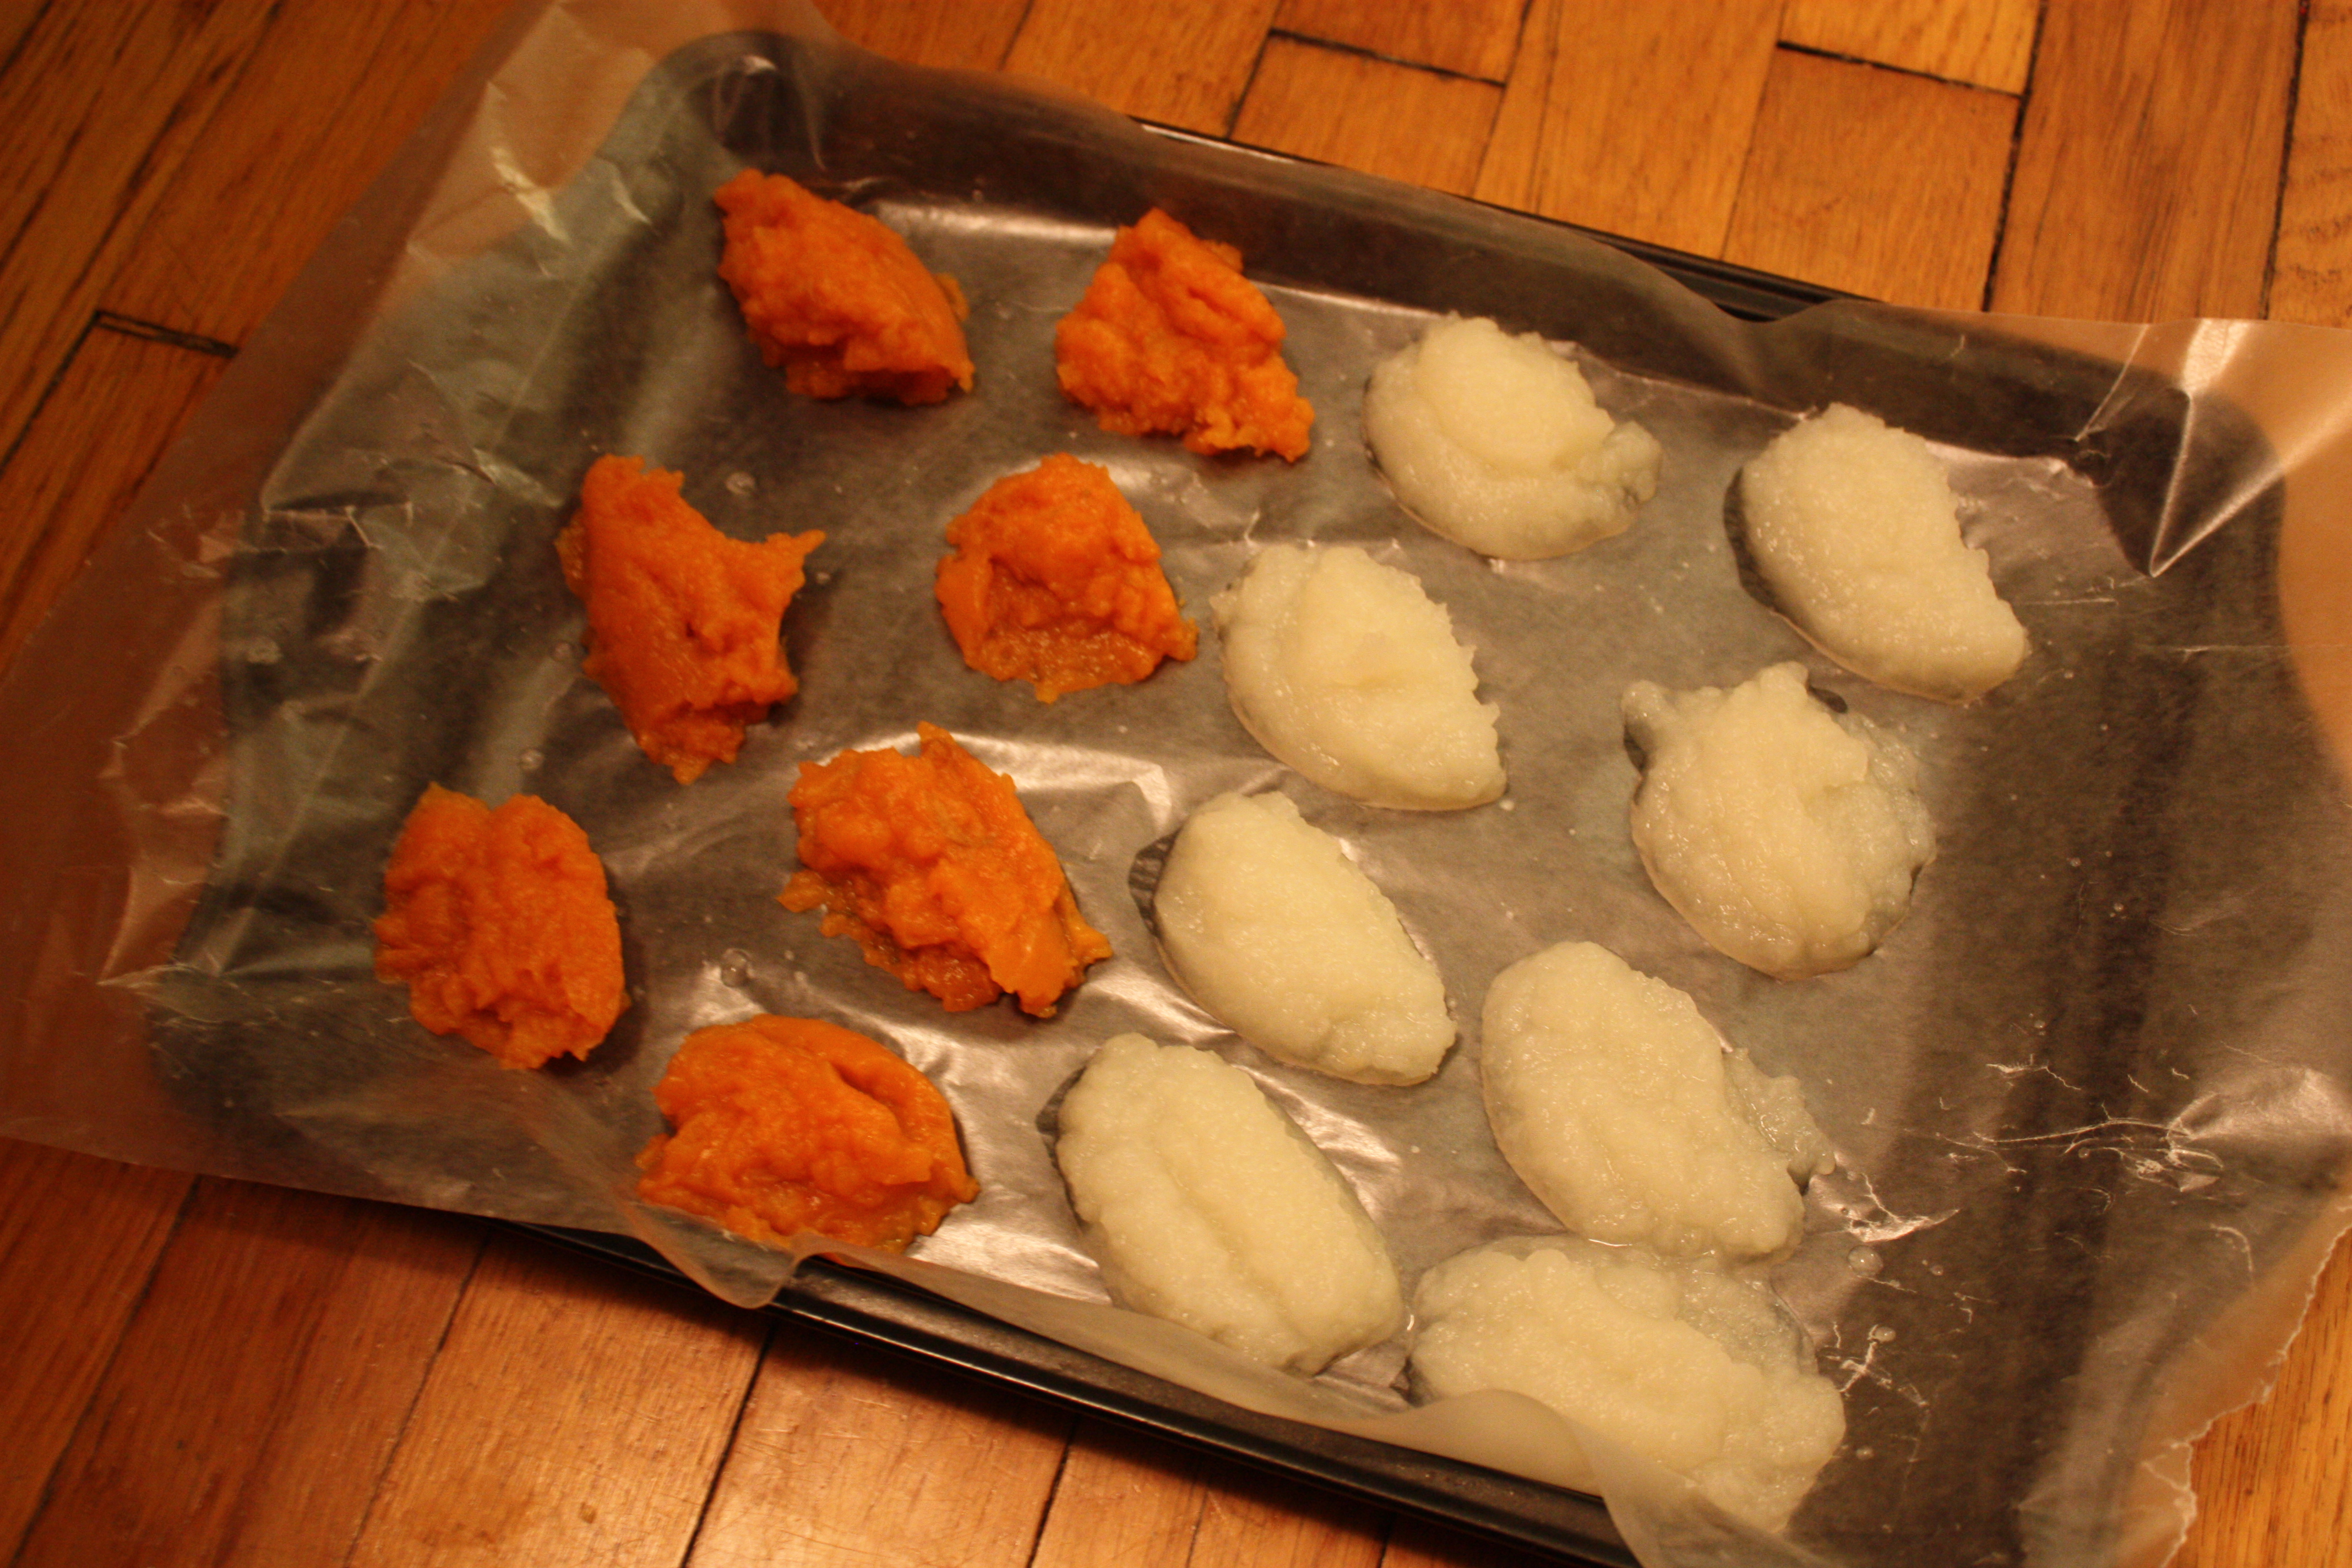
I was making soup last week so I separated out some yams and turnips before fancying up my seasoning and blended them on their own. And then I borrowed a technique from my dear friend Angela: once blended, take a spoon and throw down “splats” (splat being the technical term in this highly technical and specific process, ahem) of blended veggies on a wax paper covered cookie sheet. Then freeze said splats, remove them from the sheet and have baby-sized splats stored in tupperware or freezer bags, ready to pop into a pot for a 2 minute warming and presto! Super gorgeous baby food. And I only have to make a batch every couple of weeks. Awesome. Here’s Gene’s first ever round of yams and turnips:
TRAVELLING WITH A SOOTHER!

I was very judgemental about soothers/pacifiers/dummies before I had Rudi. Then I had Rudi. And he was a sucker. And anything that soothed my baby made sense, so I gave and a soother family we became. I feel just fine about it! To each his/her (pronouns just for you Angela, bloody capital-F Feminist!) own I truly feel. But I digress, this adventure is not about to soother or not to soother, it’s about how to hang onto the dang things if you use ’em.

Gene and I got on a plane 3 days ago. The day before, as I watched the soother fall out of his mouth and roll around and around my (obviously sparklingly clean, ahem ahem) dining room floor I remembered: I needed a soother holder, I had no time, I didn’t want to spend $9 on some ribbon and a clip, I sew. I added it up, looked around, saw my beloved sheep-and-black-sheep ribbon roll, some twill tape from a 4-pack of Beau’s beer and a sports lanyard of my husband’s.

I knew what I had to do.

The clip from the lanyard was quickly cut off, the ribbon sized up against Gene’s (unaturally, hilariously long) torso, the twill tape turned inside-out so as to appear plain and un-beer-related. I sewed, I came up with this:
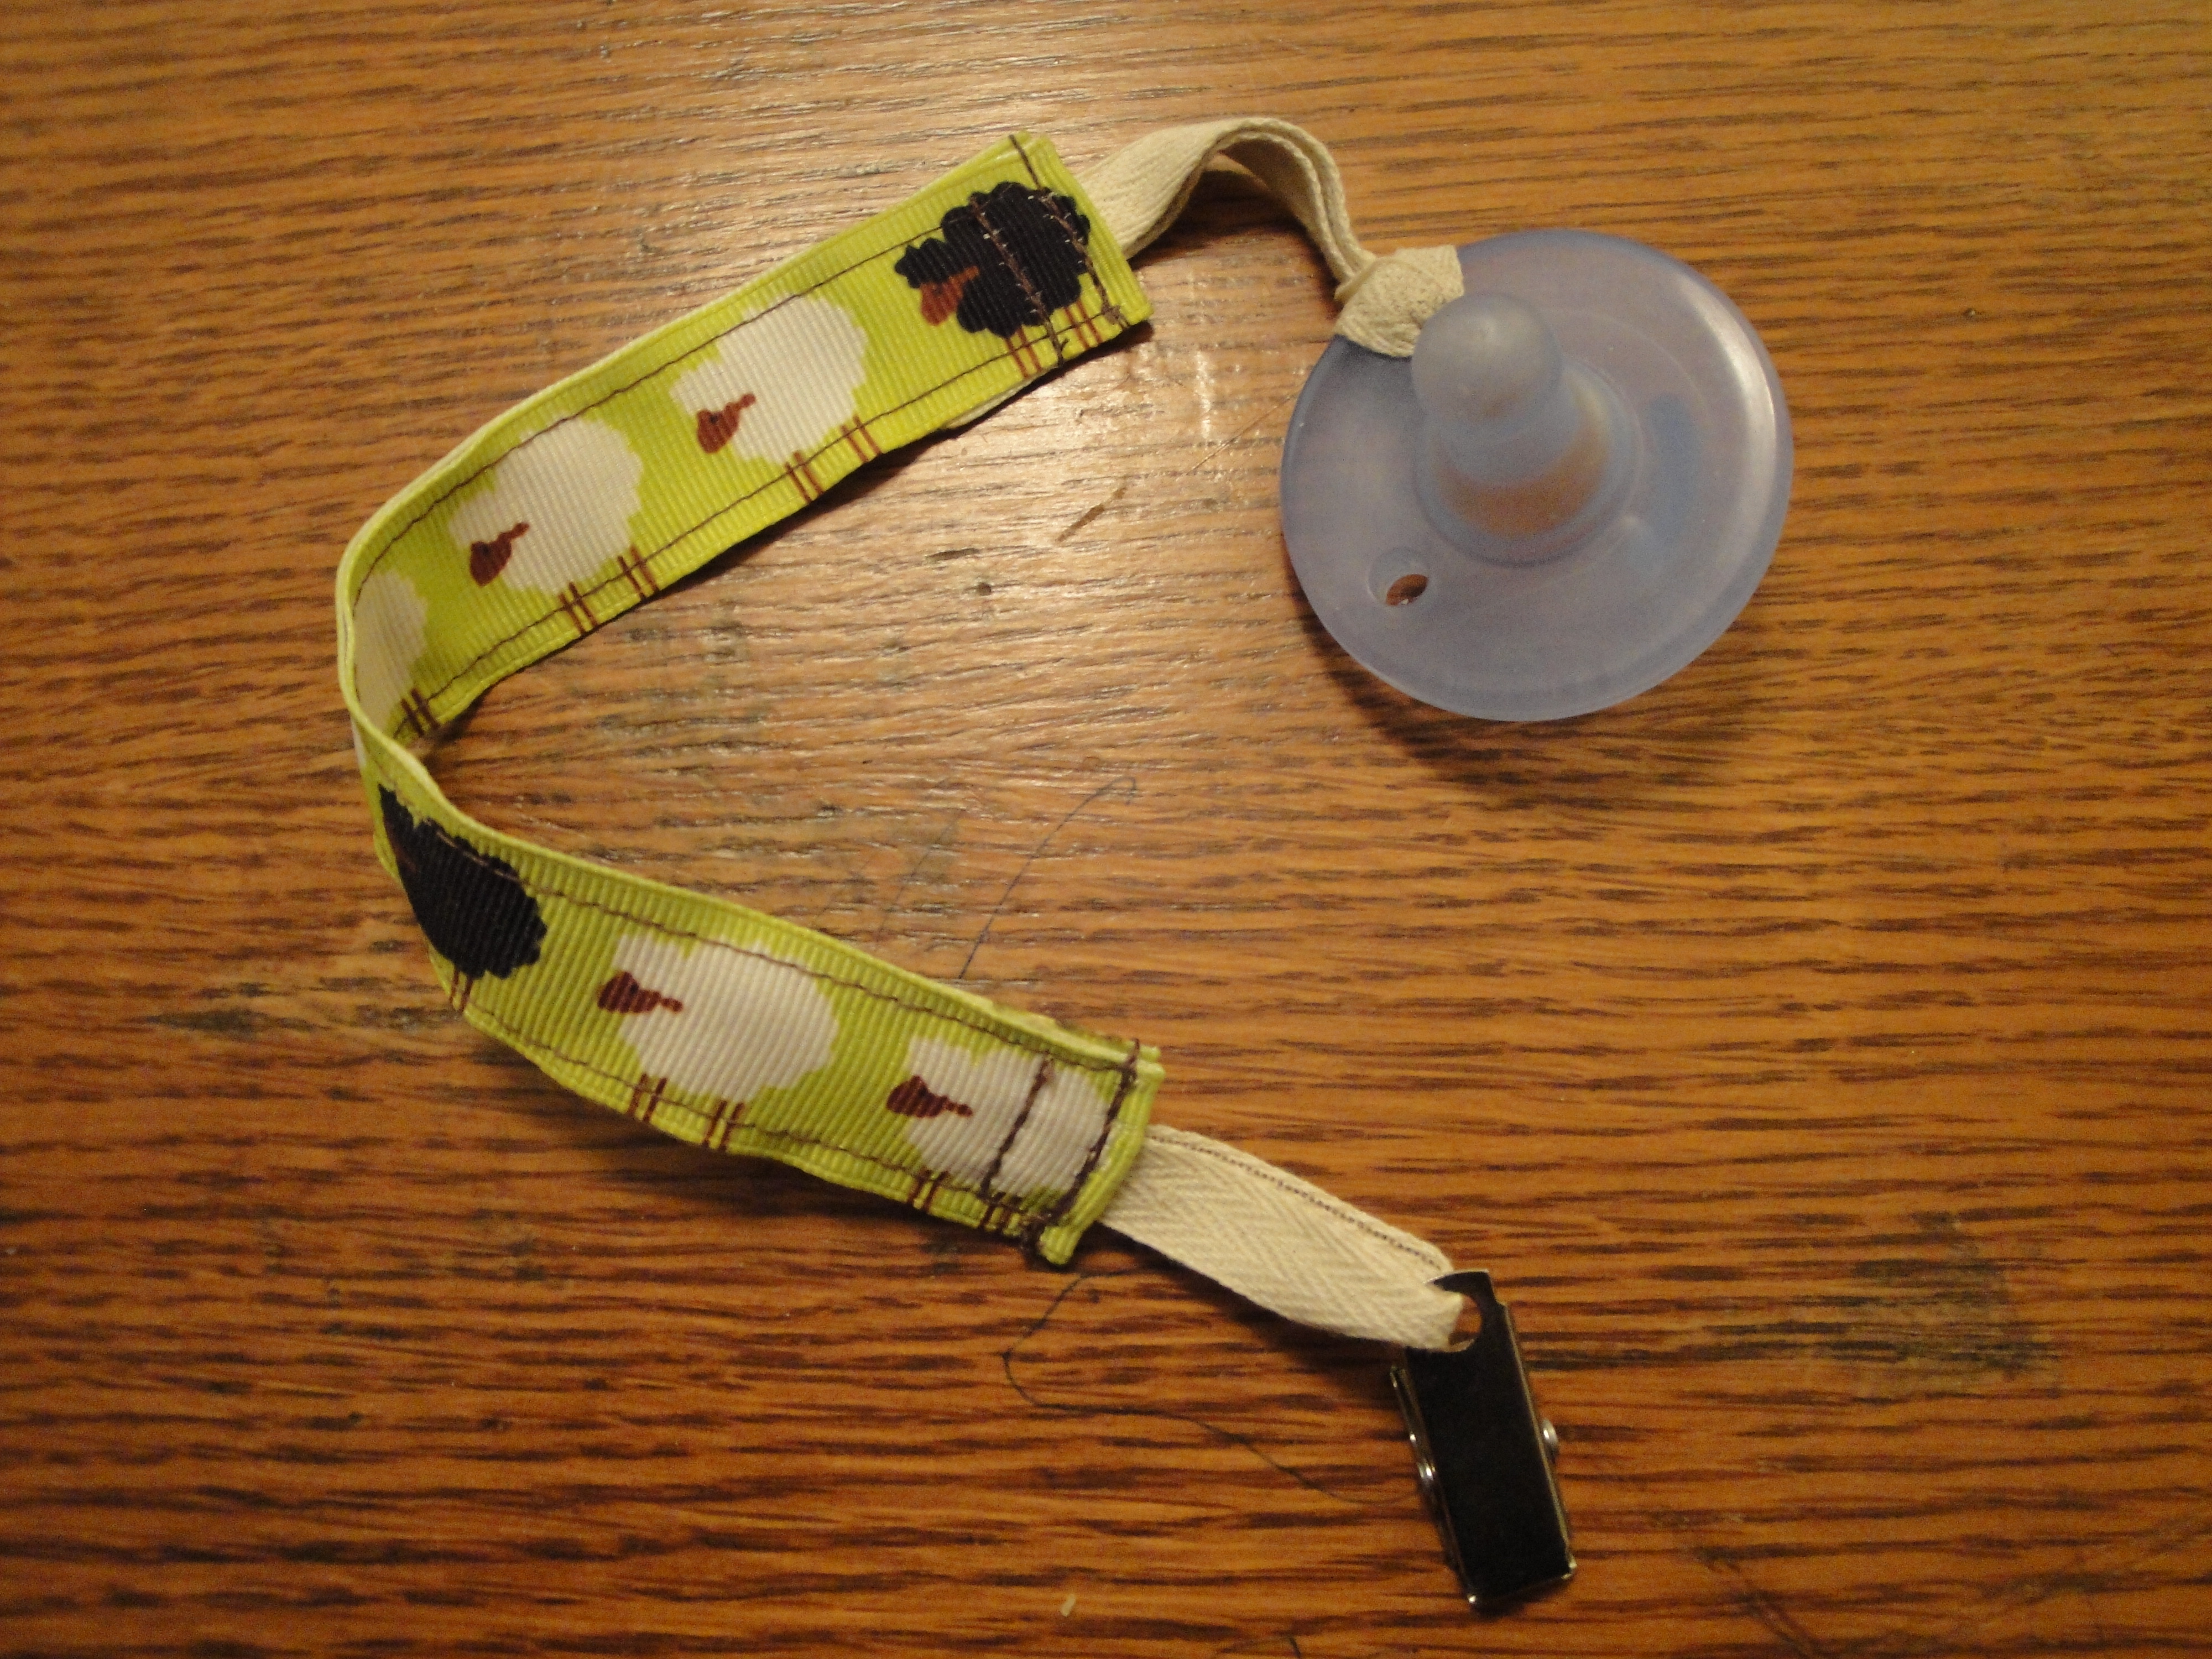
It works like a charm and I got compliments all over the airport. Notes to future travelling self: 1. shoulda brought an order form, 2. need to take business cards.

BEING QUIETLY AWESOME FOR YOURSELF!

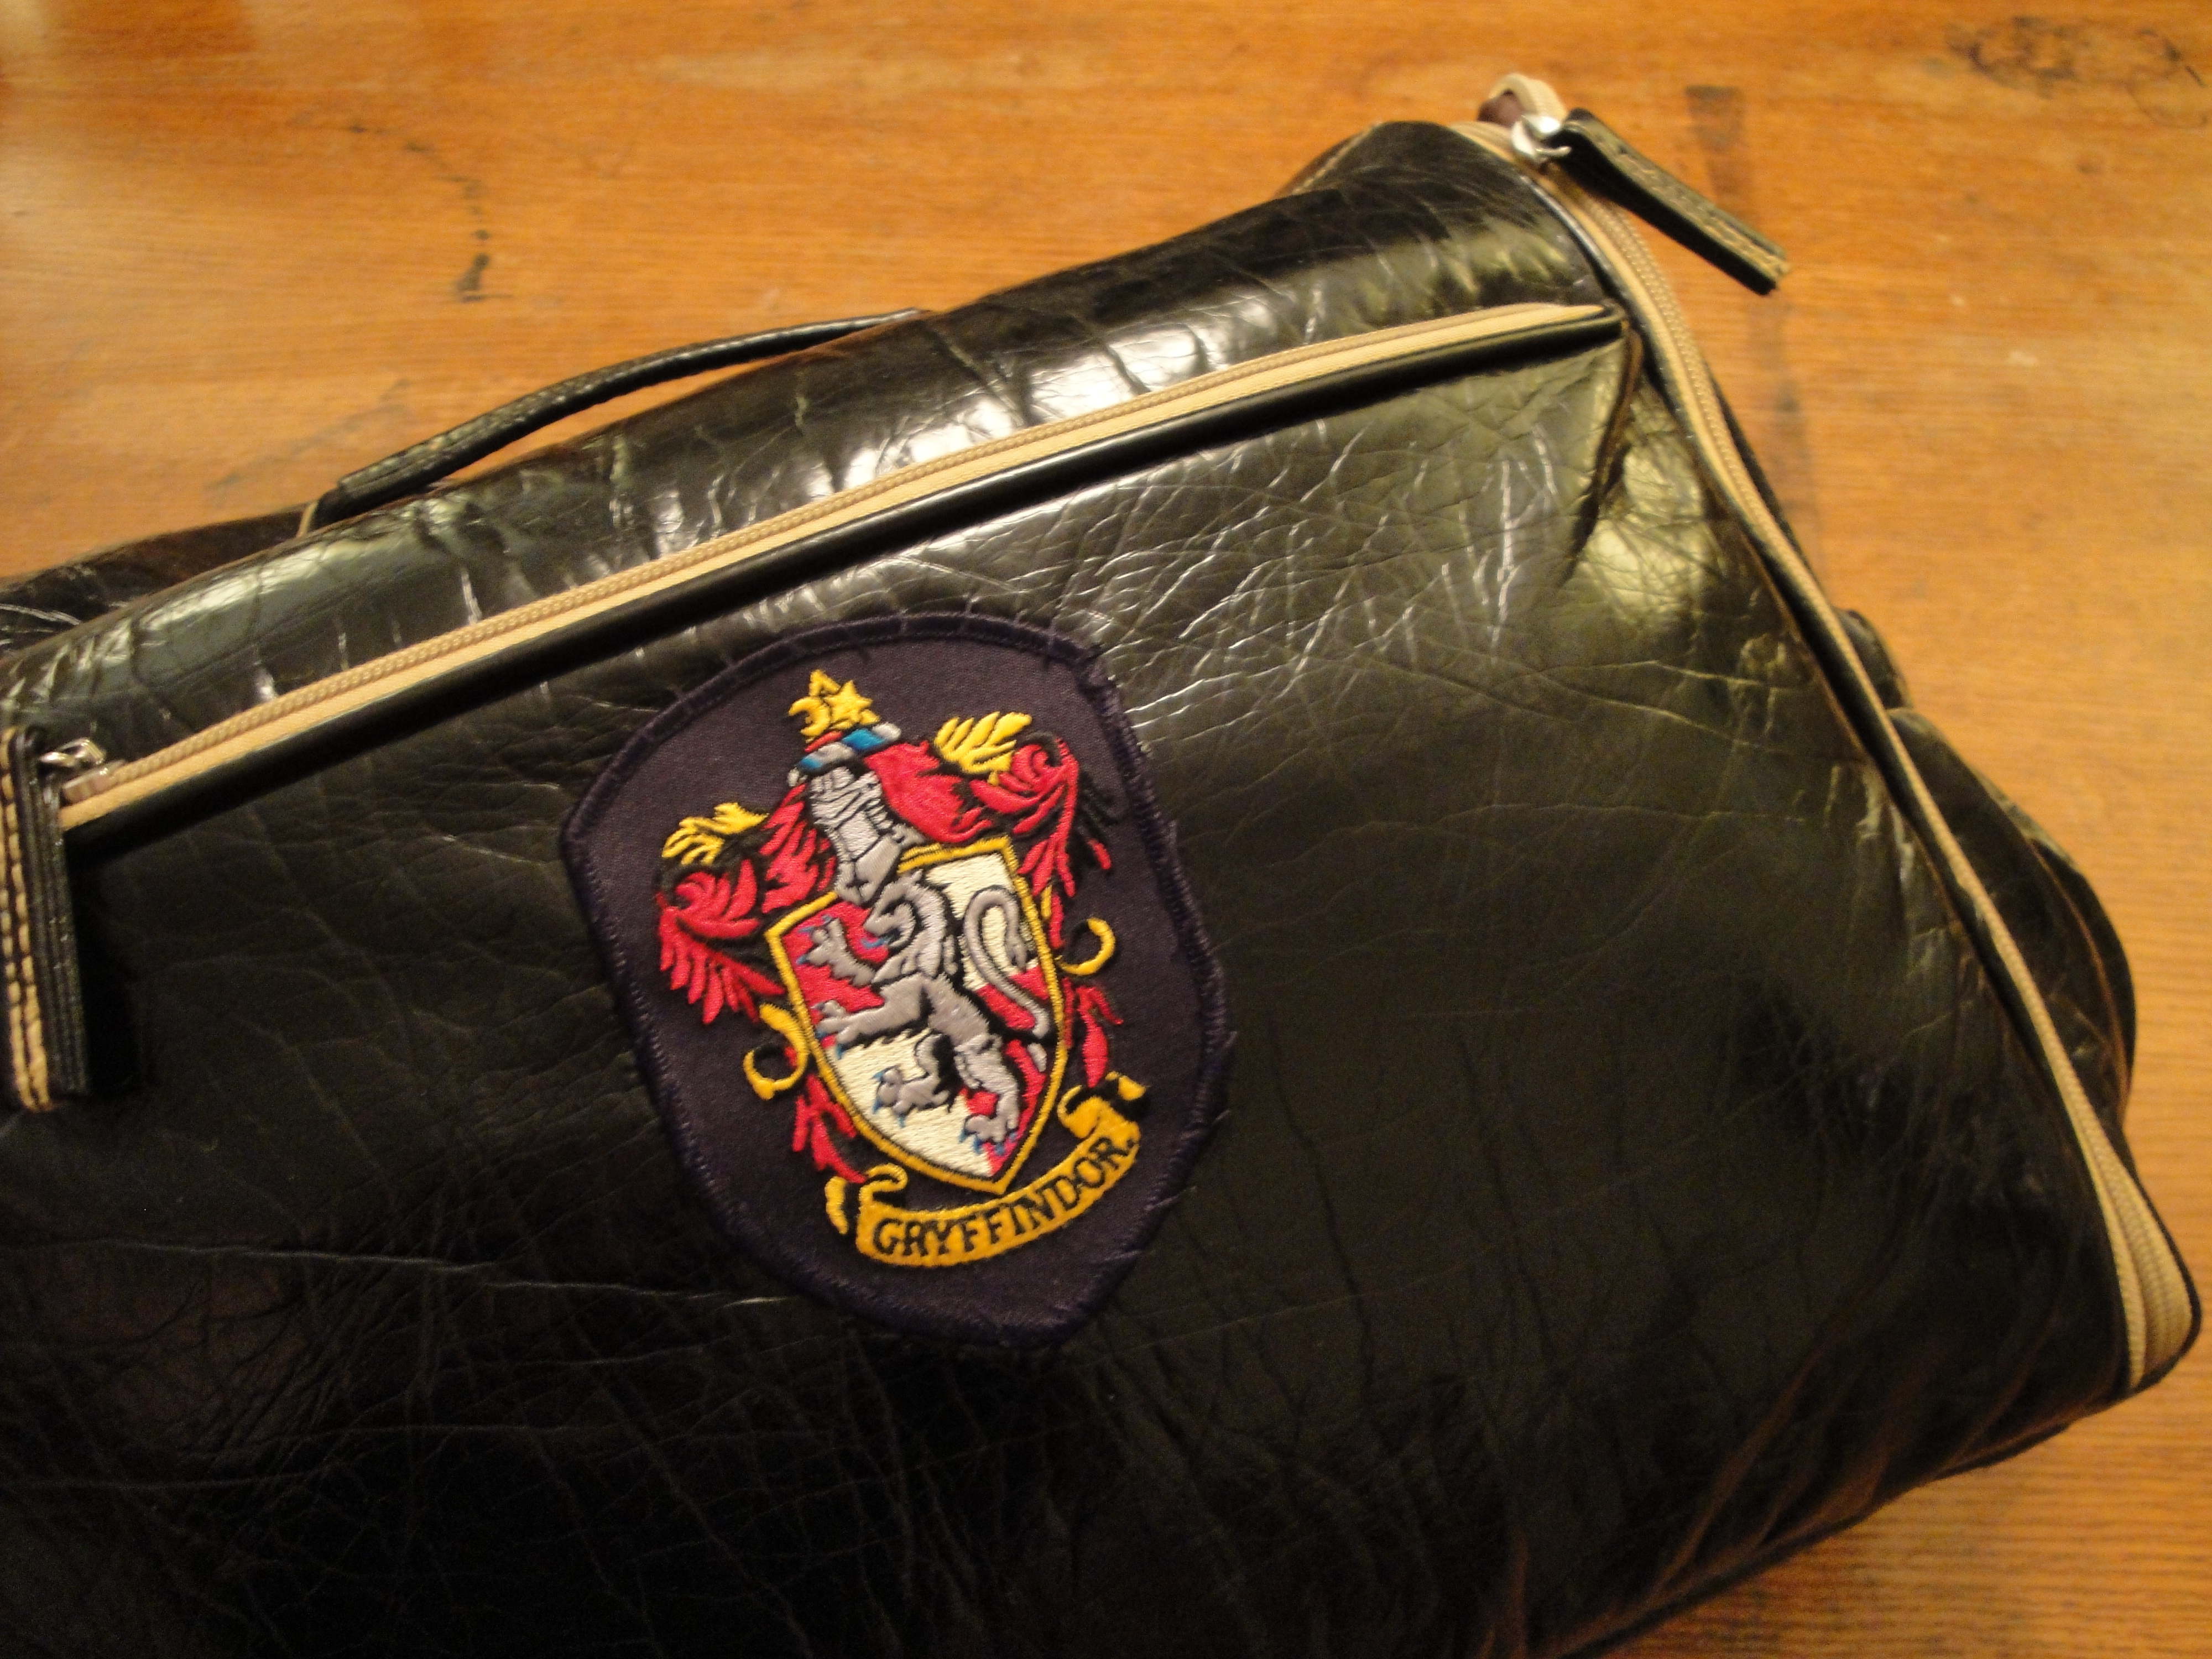
Sometimes you need to add a little personal-awesome to your ensemble for yourself. A private joke for you. I like love adore Harry Potter.  I must not tell lies. So when I got an awesome faux patent diaper bag just before Gene was born, I knew I had to jazz the lameish logo up a bit. So naturally I sourced a Gryffindor patch and sewed that sucker right over the offending label.

And now I am infinitely cooler as I walk along with my bulging bag. Almost no one has noticed, but I love it. It’s like wearing leopard underwear, privately knowing that you’ve spiced, jazzed, expelliarmused it up a notch!
Rain Day

It’s January and yet the Toronto weather has covered almost ALL of the currently available seasons, from relatively balmy to pouring freezing rain to snowing and back around. Rudi (who is 3) is deeply confused about what footwear to use as there is a smorgasbord of shoes and both snow and rain boots. Today it is a rain day, serious enough that we buckled down for a crafty, cozy, thoughtful day in.

I tend towards melancholy and sentimentality (in an Anne of Green Gables sort of a way) so a rainy day really cranks up my dramatic misty-eyed side! Lots of contemplating change and what my work means to me and how I do/will define myself as a crafter and/or business woman with my sewing, what I’ll choose to make for business and what I’ll reserve for simple creative pleasure, and so on. It’s all good thinking inspired by a conversation with a new friend made last week — a friend of a friend who’s a long-time, self-employed creative type.

Alongside the contemplating, there’s some good old fashioned Hotwheels and Cars 2 games going on throughout the house, just to balance things out!

Rudi agreed to help me create my first ever how-to for the blog while we made some rainy day juggling balls! So here we go, for a quick and easy craft, just follow along!

How to Make Balloon Juggling Balls:

THE CRAFT: layered balloon juggling balls
TO START: You'll need: lots of balloons (3 per juggling ball), scissors, lentils (or rice), thin plastic bags (we cut ours from the corners of kitchen garbage bags)
STEP 1: Pour 1/2-3/4 a cup of lentils (or rice) into your plastic bag
STEP 2: Tie a tight knot in the bag (or you can use a tiny elastic)
STEP 3: Cut off the excess bag above your knot
STEP 4: How your bag of lentils should look (pause for dramatic effect) yes, correct, sort of like drugs found in a suspected mule's esophagus or butt on a bad TV show. No need to read this step out to the kids in the house. And now continue on to step 5!
STEP 5: Cut the narrow bits off your balloons
STEP 6: Wrap 2 of the balloons around the bag of "lentils", one over the other, so that there is no plastic bag showing. I used the same colour for a consistent base (but you can get wild and go with 3 or more colours of course!)
STEP 7: Cut some extra holes in your 3rd balloon, 2 or 3 should do the trick
STEP 8: Wrap your 3rd, holey balloon over the first 2 balloons and you're there, 1 lovely, multi-coloured juggling ball done!
FINISHED! Ta-da! A variety of well weighted yet not too dangerous juggling balls.